Daisy-zam - Studyblr Tips/Tricks

More Posts from Daisy-zam and Others


01.17.2018
Study set up for today! Studied for an exam I have tomorrow. I am enjoying having my notes on Pages, far quicker, convenient, and efficient. I can go back to add or change things, I have all of my module assignments and study material in the same document.
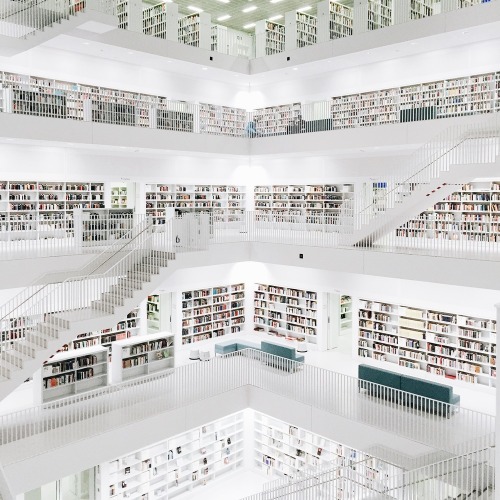


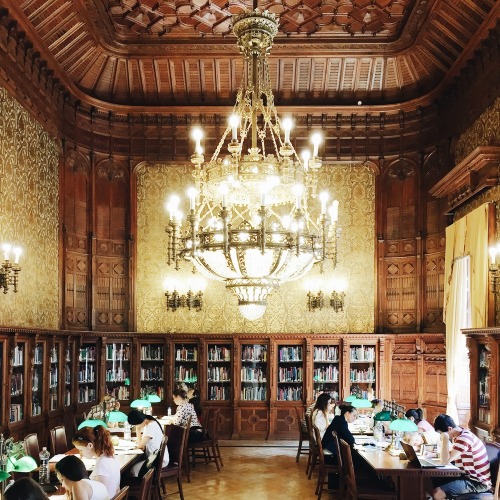
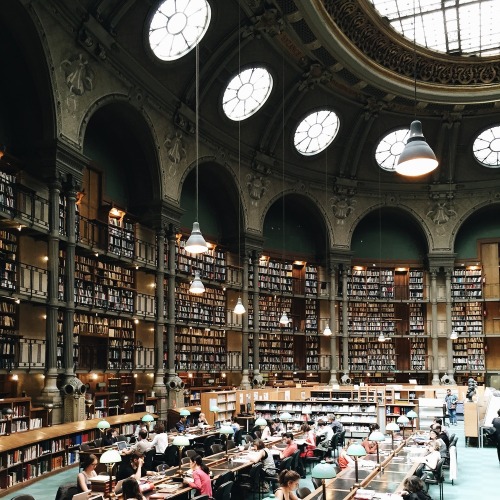
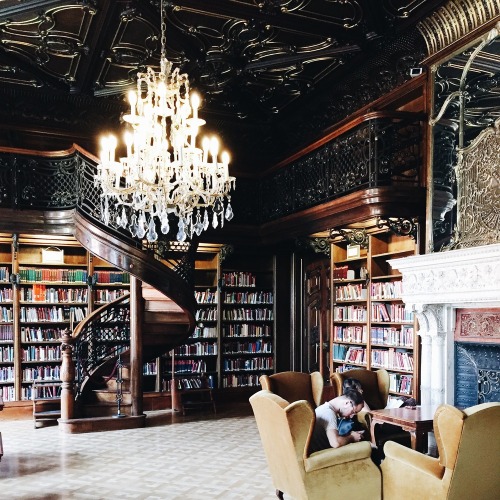
das Bibliothek, Olivier Martel Savoie

GETTING A JOB CHEAT SHEET!!
perfect resume for someone with no experience
A+ advice on writing cv’s
a guide to writing your resume
how to get a job fast as hell
resume writing tips
jobs and careers masterpost
how to answer interview questions
career and employment masterpost
strong words to use on a resume
34 crucial tips for your next job interview
how to write a cv
resume cheat sheet
how to write a cover letter
job hunting resources
Find a job in your field
7 questions you should ask at the end of every interview
how to get a job before you graduate
how to be good at interviews
other cheat sheets
![OneNote Is Literally God’s Gift To This Earth. [ Header Art ]](https://64.media.tumblr.com/db1b68f6a2f7b12938716bf5f56e6e57/tumblr_inline_om4uqsuEr91uwg6bk_500.png)
![OneNote Is Literally God’s Gift To This Earth. [ Header Art ]](https://64.media.tumblr.com/c6b36f7565bda18f4a5eb08706fd2e83/tumblr_inline_om4th9E3jG1uwg6bk_500.png)
OneNote is literally god’s gift to this earth. [ header art ]
I downloaded OneNote onto my mac air through my school’s office365 [which is a microsoft email login thing but is easily accessible on any kind of device and you can just delete the email acc later if you want]. OneNote can be accessed on a laptop, computer or ipad/tablet. i believe OneNote is available on the appstore as well?
I use OneNote as a digital bullet journal / planner and to write down all my study notes. i also have actual books for my study notes but i tend to prefer OneNote.
OneNote is super easy to use! think of it like an actual book:
1. DESIGNING THE COVER
When you open OneNote for the first time it will ask you to create a Notebook. You can name it whatever you wish and even choose the colour of it! You can have as many Notebooks as you like, so go wild !!
2. CHAPTERS
In your Notebook, you can have “chapters”, called sections or tabs. Depending on whether you use OneNote as a bujo or for study notes, these tabs can look like this:
![OneNote Is Literally God’s Gift To This Earth. [ Header Art ]](https://64.media.tumblr.com/dee1d9d6e24638244a2f0ec67b040adb/tumblr_inline_om4u5zDkEF1uwg6bk_500.png)
![OneNote Is Literally God’s Gift To This Earth. [ Header Art ]](https://64.media.tumblr.com/707a59ca267754def9260ade4df2eca0/tumblr_inline_om4u5u9Y2M1uwg6bk_500.png)
3. PAGES
Time to fill your chapters! These pages will contain all of your content. Whether that’s a weekly spread in your bujo or a page on DNA molecules in your humanbio Notebook. You can have as many as you want! Pages on OneNote tend to look like this:
![OneNote Is Literally God’s Gift To This Earth. [ Header Art ]](https://64.media.tumblr.com/bb2ad69e66102b4566a5cbda8f755548/tumblr_inline_om4u69kjRJ1uwg6bk_250.png)
![OneNote Is Literally God’s Gift To This Earth. [ Header Art ]](https://64.media.tumblr.com/41b9e177955a5b0792f76613787fb157/tumblr_inline_om4u65fXji1uwg6bk_250.png)
Once you click on which page you want, it’ll open !
4. SPREADS [for planners]
Spreads are completely personalised and customised depending on you! Anything you do in your physical bujo you can do on OneNote. Habit checker? Tables? Homework diary? Inspirational quotes? Cute doodles? Day-to-Day planner?
![OneNote Is Literally God’s Gift To This Earth. [ Header Art ]](https://64.media.tumblr.com/fdd019543c9a69de48dc204ef969af33/tumblr_inline_om4tz2V8H31uwg6bk_500.png)
This is just an example of mine, you can do WHATEVER YOU WANT with yours !!
5. STUDY NOTES
My study notes are basically just what my teacher says during class or puts on the board, which is why they’re almost always in bullet point form like this:
![OneNote Is Literally God’s Gift To This Earth. [ Header Art ]](https://64.media.tumblr.com/95b67676e7e43358c5a80a5ce2fb92d2/tumblr_inline_om4u1c54q91uwg6bk_500.png)
But obviously, you can edit your notes to be however you’d like them !!
6. OTHER INFO
One feature i really like about one note is the fact you can make the paper look like whatever you want. such as blank paper, margined + lined paper, graph paper etc. this is really helpful when writing notes and especially drawing diagrams !!
![OneNote Is Literally God’s Gift To This Earth. [ Header Art ]](https://64.media.tumblr.com/d09e48ff42f0cd2b83738bc13e881e2d/tumblr_inline_om4u4w6Xnp1uwg6bk_500.png)
also, across the top is literally everything you’ll ever need.
![OneNote Is Literally God’s Gift To This Earth. [ Header Art ]](https://64.media.tumblr.com/db1b68f6a2f7b12938716bf5f56e6e57/tumblr_inline_om4uq9qHEY1uwg6bk_500.png)
IN CONCLUSION:
Please download OneNote !! it’s so user-friendly and customisable. I was honestly shocked that more people weren’t using OneNote in the studyblr community. It’s such a lifesaver near test + exam time because all of your notes are in one place !!
also, OneNote autosaves and doesnt close if you close your laptop [as long as you’re not logged out or the computer is shut down] so you’ll never lose your work !!
HERE is another post about me yelling about OneNote lmao
If you have any questions or problems, feel free to ask !! ((-:

Hey, there! Someone recently asked me, “How do you make a moodboard?” It’s a tough question to answer, actually, because I wasn’t sure if the person meant conceptually (the process of conceiving one) or technically (the process of putting it together on a computer). So, I thought I’d make a masterpost covering both, as well as some tips on aesthetics.
Step 1: Conceiving of your moodboard
Sometimes people will make requests, and half the work will be done for you. They’ll request “Hufflepuff, doodles, tea, INFP, Virgo, travel” and you’ll know that these are themes/motifs/images that you should try to include. Alternately, you may have a more general feeling that you are trying to evoke through images: melancholy, for example. You may also have a specific aesthetic that you’re trying to achieve. ~Aesthetic~ is a tricky word and can mean several different things in varying contexts. “Brooding sad girl lyfe” could be an aesthetic, a cohesive visual goal. In this case, all the components of the moodboard would be contributing to this notion of a brooding sad girl and her lyfe.
Step 2: Finding pictures
Once you have an idea of where you want to go with your moodboard, it’s time to hunt for images! I like to surf the tags on Tumblr, and if I can’t find something that suits my needs there, I’ll turn to Google images. Remember to keep track of where you find your pics so you can give credit later (or even better: ask permission to use them).
Step 3: Making the thing
You can compose a moodboard by simply uploading photos to Tumblr and moving them around, or you could use graphic design software. I like to use Canva because it’s easy and free. It also allows you to save the moodboard as a single image. I’ll briefly go through making a moodboard with Canva.
First choose a size by clicking “Use Custom Dimensions”: 900 x 900 pixels is standard for square moodboards. You can also set the size using inches instead of pixels.

Then you choose a layout from the lefthand menu.

Next, load your pictures by clicking “Upload” in the lefthand menu. Once they’re uploaded, you can begin dragging them over to the cells. Double clicking a picture allows you to adjust its positioning in the cell.

When positioning the photos, I always like to keep in mind balance: of light and dark, of colors, of subject matter. I wouldn’t want two pictures of teacups next to each other. I wouldn’t want two pictures of text next to each other either. Balance is key. Glancing over it quickly, you should get a sense of a flow of images, with nothing too jarring or standing out. This will make for a cohesive moodboard.

My personal style is a little busier than most, meaning the images are more crowded and cramped. I find this gives the moodboard more texture and makes it more visually interesting. This is just my opinion. I still find minimal moodboards to be beautiful, too.
Step 4: Posting the thing
Always give credit where and when you can. And the more credit you give the better: if you know the photographer’s name–awesome! If not, then the blog where you found it should suffice. Some people believe you should ask permission before posting a photo to a moodboard, but often this won’t work in the interest of time. It’s actually a little bit of a controversial subject; many people practice crediting in different ways. This is just my suggestion. I also usually offer to take down a photo if the owner objects. I used all my own images for this masterpost and blurred out others to save myself the trouble :) You really should credit the owners, though.
I hope this was helpful. Message me with any questions or feel free to add on!
What is an “instant” death anyway? How long is an instant? Is it one second? Ten? The pain of those seconds must have been awful as her heart burst and her lungs collapsed and there was no air and no blood to her brain and only raw panic. What the hell is instant? Nothing is instant. Instant rice takes five minutes, instant pudding an hour. I doubt that an instant of blinding pain feels particularly instantaneous.
John Green, Looking for Alaska (via waitingforothershadows)

Photography: Karolina Kozłowska
*please, reblog if u’re a studyblr*
i’m new here and need a lot of blogs to follow (・w・)also if you talk to me i’ll be really happy (i’m a shy kid)
-
 ssabriyee-blog1 liked this · 6 years ago
 -
 daisy-zam reblogged this · 7 years ago
 -
daisy-zam liked this · 7 years ago
-
 xxbitchx reblogged this · 8 years ago
 -
 awkwardtur-tle reblogged this · 8 years ago
 -
 cal-cece-iydk liked this · 8 years ago
 -
 minimalismworld reblogged this · 8 years ago
 -
 julan98 liked this · 8 years ago
 -
 fuckwarm liked this · 8 years ago
 -
 kate123460 liked this · 8 years ago
 -
 perfectlyscentedcollector-blog liked this · 8 years ago
 -
 ohimgrace-blog liked this · 8 years ago
 -
 iammaniac reblogged this · 8 years ago
 -
iammaniac liked this · 8 years ago
-
 the-real-lover liked this · 8 years ago
 -
 inniallerheart liked this · 8 years ago
 -
 alohaparis liked this · 8 years ago
 -
 gshop-it liked this · 8 years ago
 -
 fesztivalazelet liked this · 8 years ago
 -
 quiteexception4l liked this · 8 years ago
 -
 cheethor reblogged this · 8 years ago
 -
 hoonragi liked this · 8 years ago
 -
 kanizm reblogged this · 9 years ago
 -
 palirue-blog liked this · 9 years ago
 -
 cestla-vies-blog reblogged this · 9 years ago
 -
 sayitwithmebby reblogged this · 9 years ago
 -
 kennethbarrett liked this · 9 years ago
 -
 lluxury reblogged this · 9 years ago
 -
 ouicestbreon reblogged this · 9 years ago
 -
 jeeerkitout reblogged this · 9 years ago
 -
 notbasicc-blog reblogged this · 9 years ago
 -
 justalittleemailacount liked this · 9 years ago
 -
 sxckafuk reblogged this · 9 years ago
 -
 endlesssummersoul-blog reblogged this · 9 years ago
 -
 avocadose liked this · 9 years ago
 -
 thekingdebr reblogged this · 9 years ago
 -
thekingdebr liked this · 9 years ago