
62 posts
Latest Posts by imeanmaybesomeday - Page 2
Resources for Mending Clothes

We toss out over 80 pounds of textiles each year. These textiles are often made of plastic materials (polyester, nylon), made in unethical conditions, dyed with harsh dyes that often get put into the rivers, etc. Even a single cotton shirt releases carbon emissions and uses tons of water.
So the best thing to prevent the unsustainable growth of the fashion industry is to make sure that your clothing lasts as long as possible. To do so, mending clothing is a must. So here are some resources to help you learn how to do various things, such as sewing a button, to tailoring clothes, or even upcycling old clothing into new styles.
* How to sew on three different types of button
* How to hand sew on a patch on a torn pair of jeans
* How to sew up a hole in an old shirt
* How to sew a simple T-shirt
* How to upcycle old clothing into new clothing
* More upcycle and sewing techniques
* How to repair a damaged sock
* How to do an invisible stitch
* 3 different stitches to work with for different results
* How to make a T-shirt smaller so it fits you better
* How to make repairs to your shoes
These are just a few of the things that you can do in order to make sure that your clothing lasts for a long time. Nobody wants to keep buying new clothing, as it is expensive and wasteful.
So making alterations to your clothing, or fixing small holes hen you see them can be hugely beneficial to your wallet, to garment workers, and to the environment in the long term.


Tiny kitty that can be made with 2 pipe cleaners. If you care. If you even care.
A brief intro to stamp making!
These are regular pink erasers from the supermarket. I'm going to make a flower. First, I trace the eraser itself to get a feel for the size.

I trace the design for each color of ink on separate pieces of tracing paper, then tape them onto the erasers and rub the graphite side down to transfer the image. Any paper that holds graphite will work for this.

Since I'm using red, blue, and yellow ink, I'm layering the stamps over top of one another to produce secondary colors like green and purple. I use a V-shaped carving tool most of the time, just a cheap one I got in a kit at Michael's. Almost anything sharp will work.

I got these Ranger ink pads also at Michael's, they're working for me so far. Slightly nicer ink pad brands usually also sell bottles of refill ink, so you don't need to buy a whole new pad when one runs dry.

Most of the time involved is spent carving the rubber and testing the print as you go. Be careful to carve in the direction away from your hands.


I think these worked out pretty well! Thanks for reading, and have fun!
REMEMBER TO HACK UR 3DS AND WII U BEFORE NINTENDO SHUTS DOWN THEIR INTERNET SUPPORT (April 8th)

Oh hey, do you know what time it is? It is highly specific resource time!
Today we have the Royal School of Needlework Stitch Bank! There are HUNDREDS of stitch types in the RSN Stitch Bank.

And more added regularly, let’s look at a recent addition

I picked the first one in the 25 recently added Elizabethan stitches, the Elizabethan French Stitch

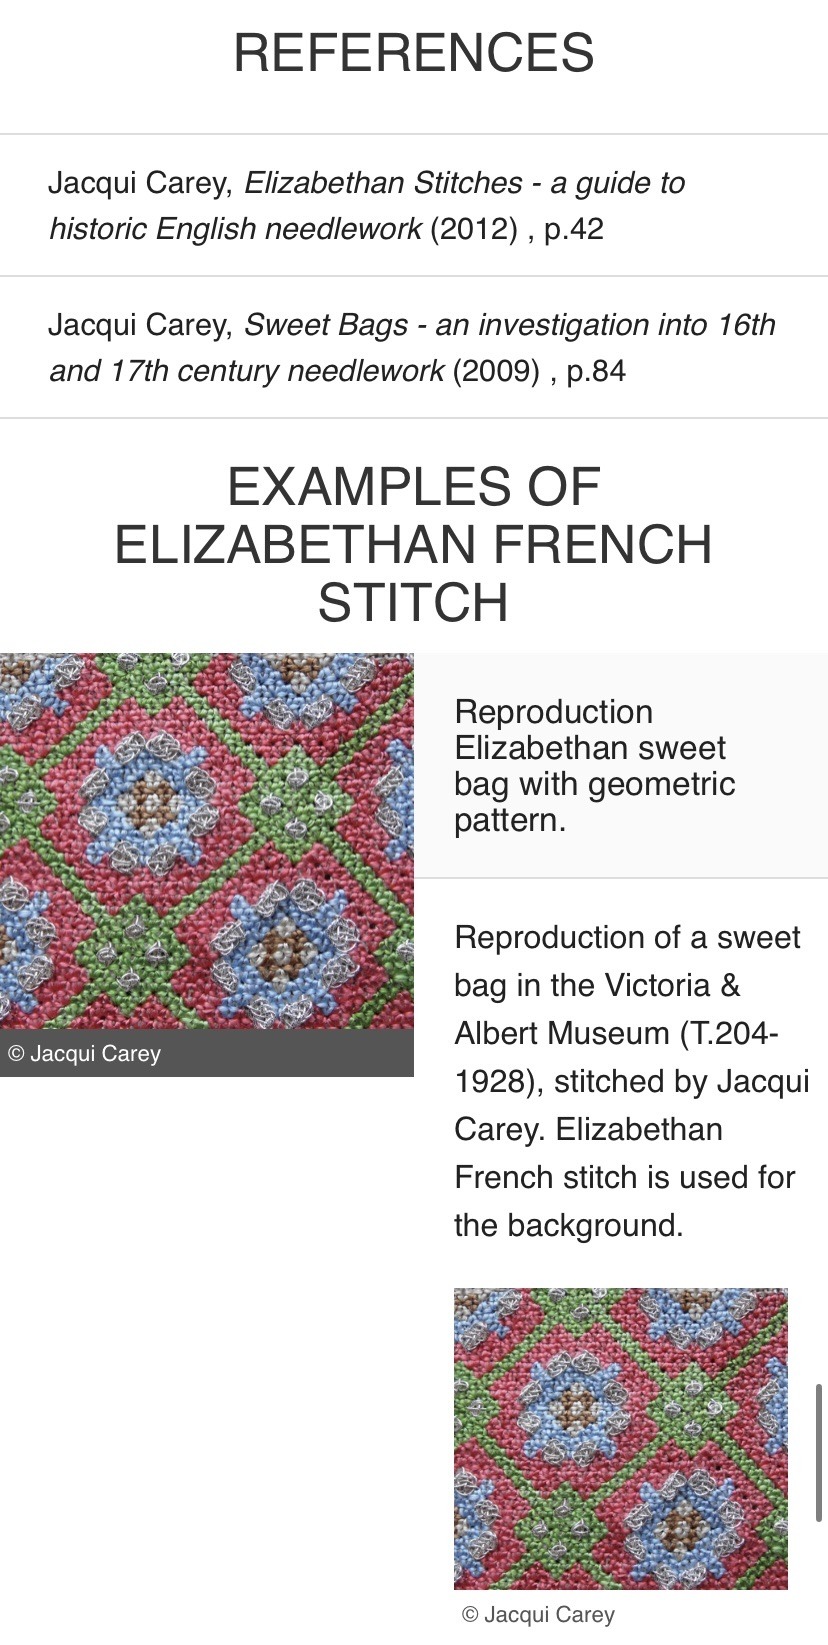
The stitch bank provides written and photo tutorials as well as a video option to learn to do it yourself. There are examples of the stitch in use, resources, references, everything but a needle and thread!
rsnstitchbank.org
繕い (;゚Д゚) ナントォ Mending a sweater
(Reddit:r/oddlysatisfying u/thegupeeman)
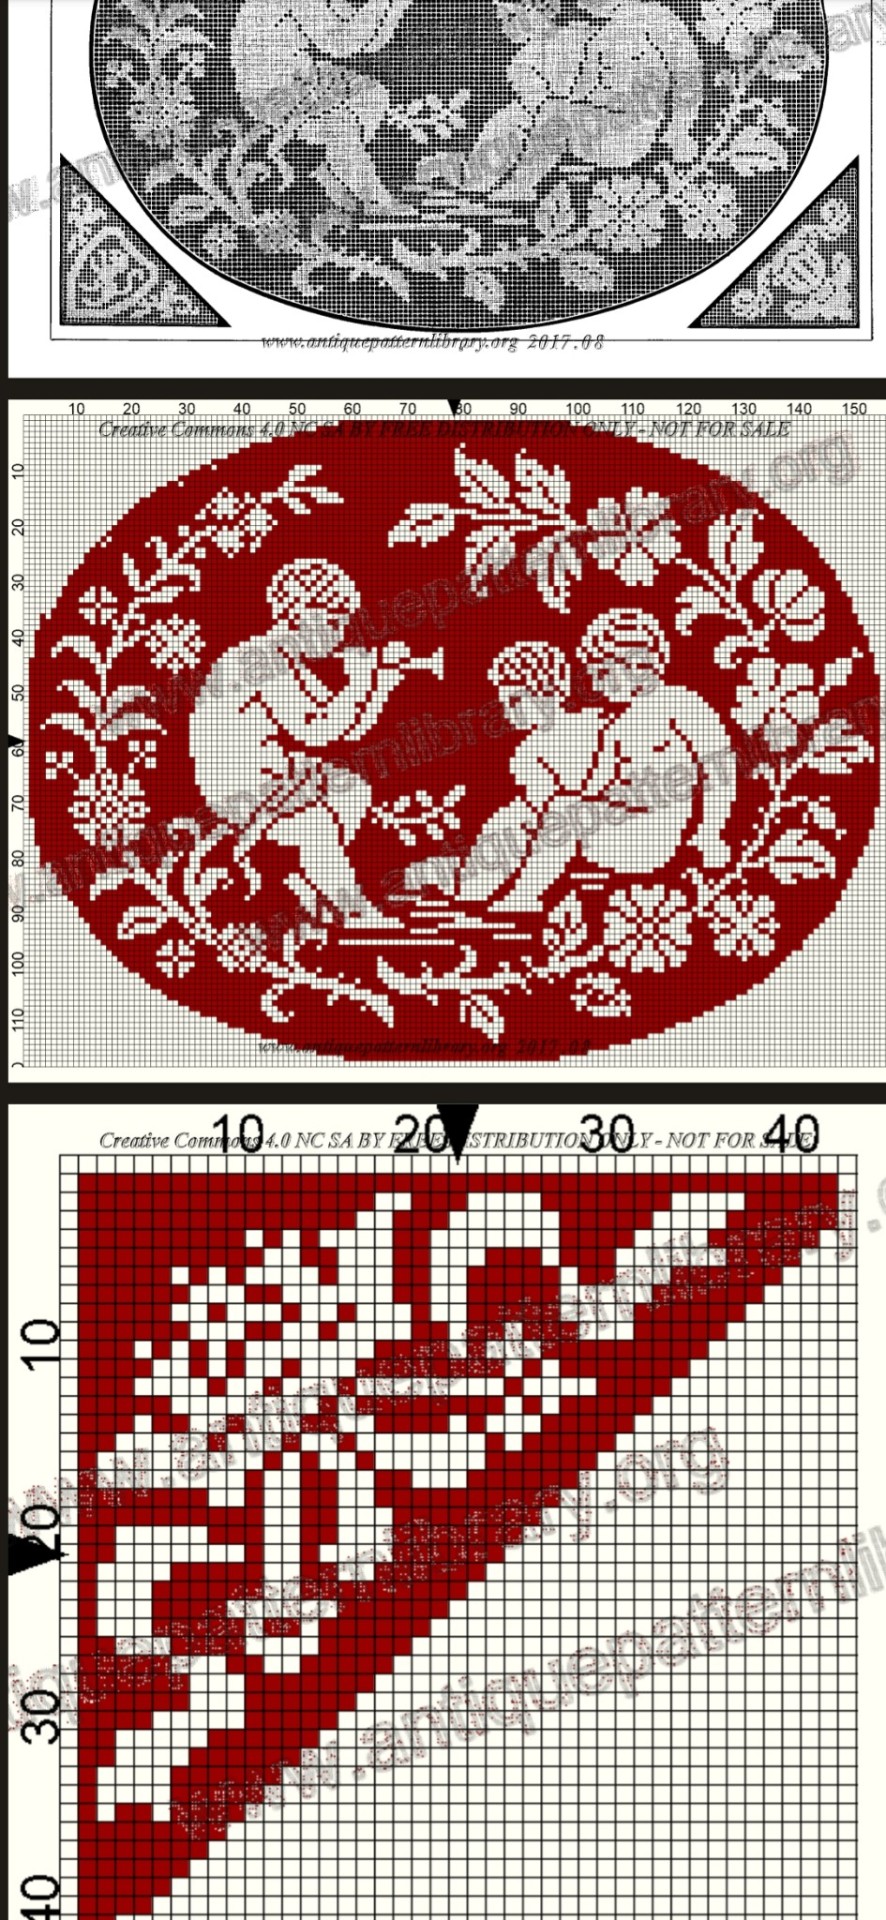
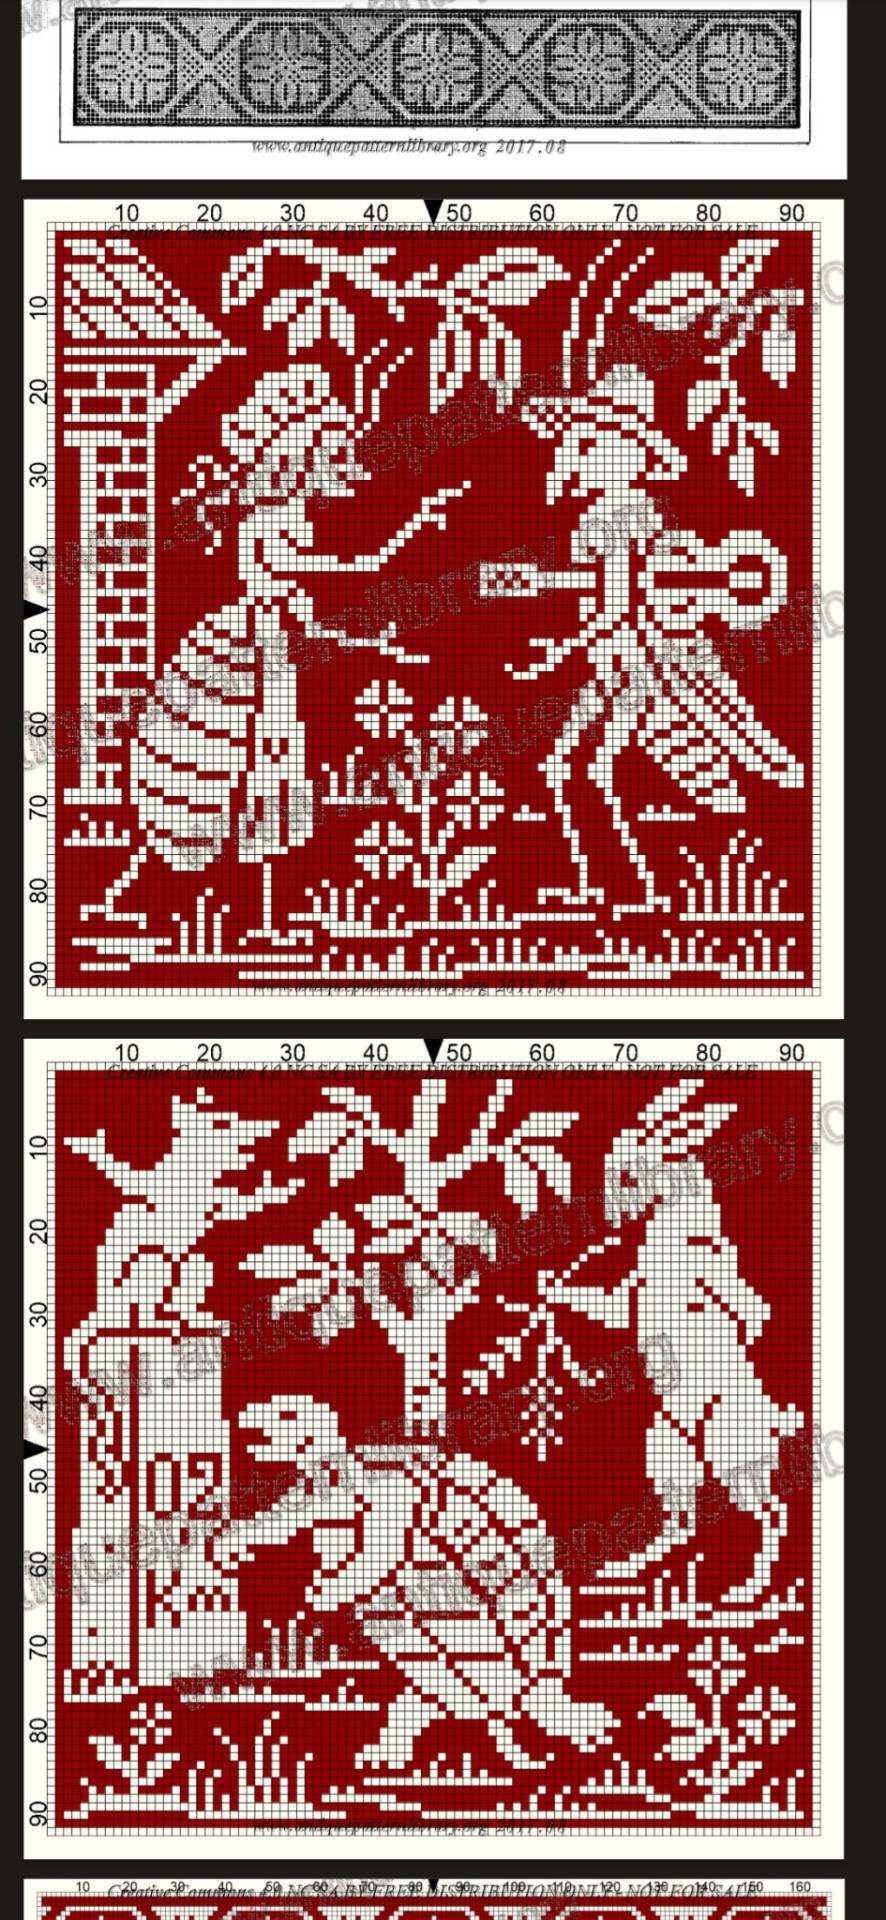
K so not to be dramatic or anything, but there's a free vintage French pattern book available on antiquepatternlibrary so if you like to crochet/weave/make pixel art/tie epic friendship bracelets don't walk- RUN.
It has scenes from aesop's fables! Cherubs doing things! Beheadings! Greek muses! Little farm people! Intricate floral pattern! Goth stained-glass window like patterns! Fun little corner pieces! Eeeeeeeeeeeeee
https://www.antiquepatternlibrary.org/html/warm/C-TT008-180.htm


:> made a shrimb ornament
Do you like vintage scientific illustrations?
Do you like not spending huge amounts of money on them?
This website has a huge collection of high quality vintage illustrations that you can download FOR FREE

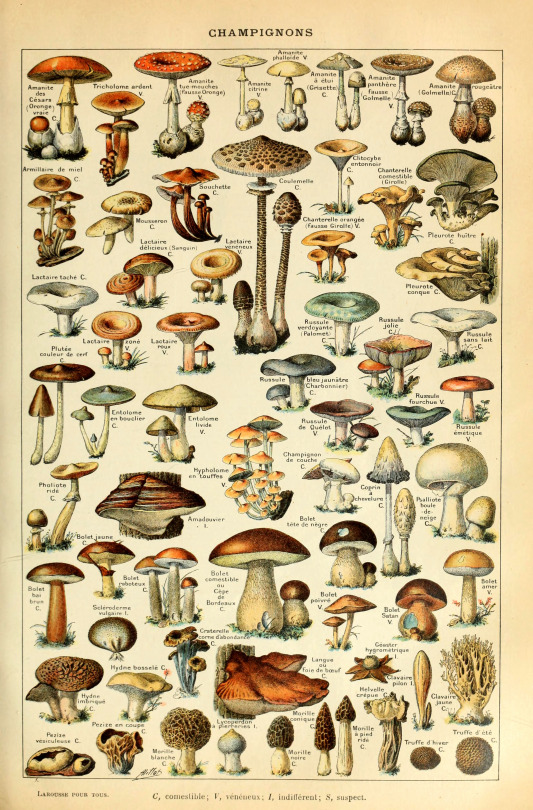
They got pretty much everything!! Vintage maps, mushrooms, flowers, trees, bugs, birds, corals, fish, palm trees, feathers, tropical fruits, you name it!!


They even got some works of my dude Ernst Haeckel on there!!!!

I could go on and on but I suggest you check it out yourself. Personally, I will be covering my entire apartment with these once copyshops are open again. But even if you don’t want to do that, just browsing all these beautiful illustrations is a great way to spend your time.
Have fun and stay save!

This website is full of free sewing patterns that will automatically alter to ur measurements
https://freesewing.org
hiii do you have any tips for home gardeners who want to grow garlic? :^) hope you're having a nice day!
Choose between hardneck and softneck (you can do elephant but its a leek family member and idk anything about it) Hardneck gives you scapes and is more cold hardy (requires cold temps tbh). Softneck does better if it gets hot where you are (i am in THE desert.) and stores a lot better (this is braiding garlic) but has no scapes and the flavor is milder than hardneck.
you dont have to do beds bc garlic is a set it and forget it type crop. but they look pretty and professional.
last year we planted in mid November and did 12 inch apart rows of 6 inch spacing between bulbs and got great results (broke all records in terms of yield and size and germination rates in the 10 years the farms been operating) but we have also spent ten years selectively getting bigger and bigger seed garlic
when you buy seed garlic im not sure how it comes but honestly you could probably get some from a farmers market and do well with it and if you are taking from a head of (softneck, idk hardneck) garlic, break off the top part of the stem, peel back the outer layers of the paper, and split the cloves apart carefully as to not rip or remove any paper on the cloves themselves. They should go into the ground with their jackets on, we’re not building a nudist colony, they’ll rot in the ground if they go in naked. Feel free to take photos and notes of damaged ones if you decide to plant them & you can see what the germination rates are like. Do not plant ones with any rot, dead spots, mold, or squish. Plant with the pointed stem side up and the flat root side down. I find it easiest to lay them out in a line and then go through with either a piece of rebar or an asparagus weeder to make a hole and drop them in. There should be 2 inches of soil on top of each clove.
They do better if they get a kind of snowy, wet winter, aka lots of water in the spring when they start really germinating
you should plant before the first real frost date but we got away with planting in mid November last year
we have shit desert soil so what we do is plant, spread a layer of compost, spread a (thin) layer of leaves, and then spread a thicker layer of straw overtop of that. What you do should vary depending on your soil composition
when harvesting your garlic in the early-mid summer (bottom two leaves should be dead/dying, pull a garlic if youre not sure and check how far along it is, note that you cant replant it) cure it, and separate out the garlic with the most cloves and biggest cloves to plant next year. The smaller the clove you plant the smaller your bulb will be
fertilize with a nitrogen rich fertilizer in the early spring before the bulbs start to get big. Do not fertilize close to harvest time. they say you can plant softneck in the spring and harvest in the fall but every time i hear ppl talking about having done that they claim their harvest was kinda shit compared to fall planting. You cannot plant hardneck in the spring they need the cold.
good luck
no, listen, when I say I want to integrate more specific solarpunk stuff in my life, i don’t mean to ask for yet again new “aesthetic” clothes that now you have to buy or make to show your support of the movement (screw that i’m consuming enough as it is), or more posts about impossible house goals, or whatever, I’m asking you what my options to build a portable and eco friendly phone charger are, im asking you viable tiny-appartment edible plants growing tricks on a budget, im asking tips to slow down when my mind and society tell me im not fast enough, i don’t need more rich art nouveau amateurs aesthetics or pristine but cold venus project, okay, i know i should joins associations where I am tho i’m constantly on the move, thanks for that, just, you know, can we get a bit more practical ??? how do I hack my temporary flat into going off the grid for the time i’m here
Why do my interests in canning, couponing, and homesteading overlap so often with blogs with titles like ‘The Obedient Housewife’?
Visible Mending
Introduction:
Visible mending is a decorative way to fix up an item. Instead of trying to make your mend as invisible as possible, the idea is to make it part of the garment's design.
Visual mending is not a single technique: it's more of a mindset. If you've got an item you love, it deserves to be mended, and if you're going to put that love into stitches, why not show them off?
That being said, there are some specific techniques that are popular with visible menders. Let's take a look!
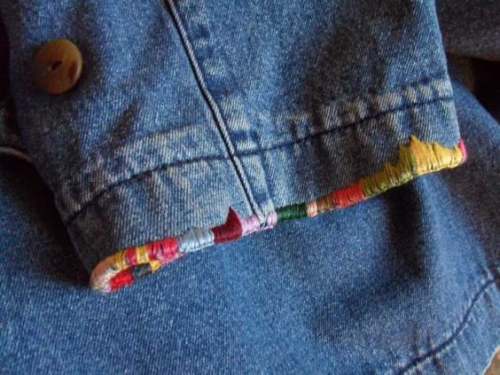
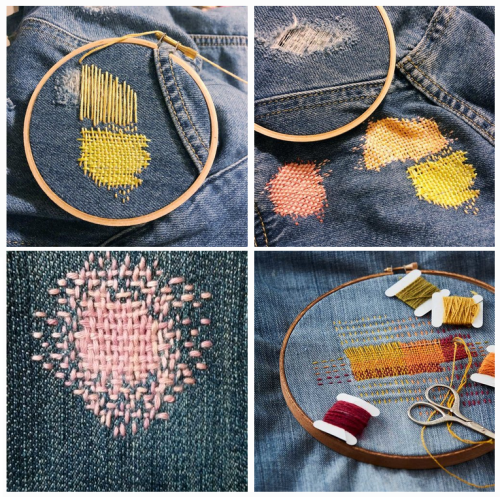
Sashiko:
Sashiko is a type of traditional Japanese embroidery that is used to both decorate and reinforce fabric. In visible mending, sashiko is often used to cover up holes with patches or to reinforce thinning fabric. This technique uses a variation on the running stitch.
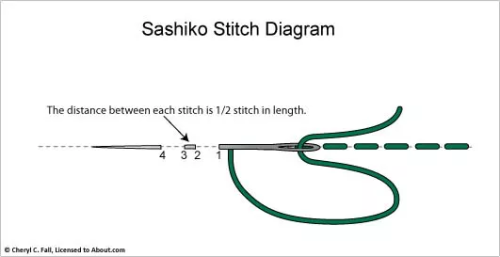
(Image source)
Some resources on sashiko:
SashiCo on YouTube: sashiko livestreams and information on the cultural aspect of sashiko.
Written tutorial by Upcycle Stitches.
Free sashiko templates by TheSpruceCrafts.
Fixing jeans with sashiko by Soluna Collective.
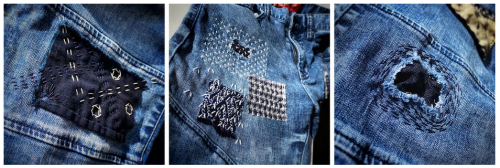
(Image source)
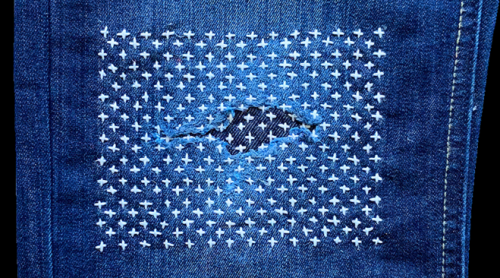
(Image source)
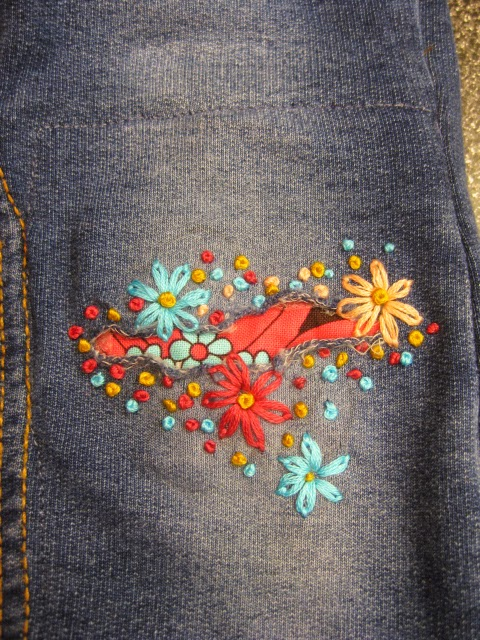
Embroidery:
Regular embroidery is also a popular technique to accentuate your mends. Check out my embroidery 101 post to learn how to get started. You can embroider patches, or use embroidery to hide or accentuate any stitches you've made to fix holes. Embroidery's also a great way to cover up stains.
(Image source)
(Image source)
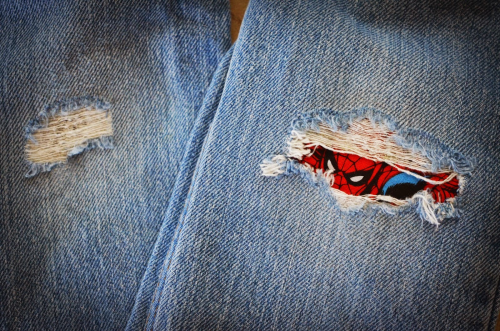
Patches:
There are many ways to add patches to a garment. My tutorial on patches is a good place to start if you want to make custom-shaped patches to sew on top of your fabric. You can also sew your patch on the inside of your garment and have it peek out from beneath the hole you're trying to fix. Fun ideas for this are lace or superheroes.
(Image source)

(Source)
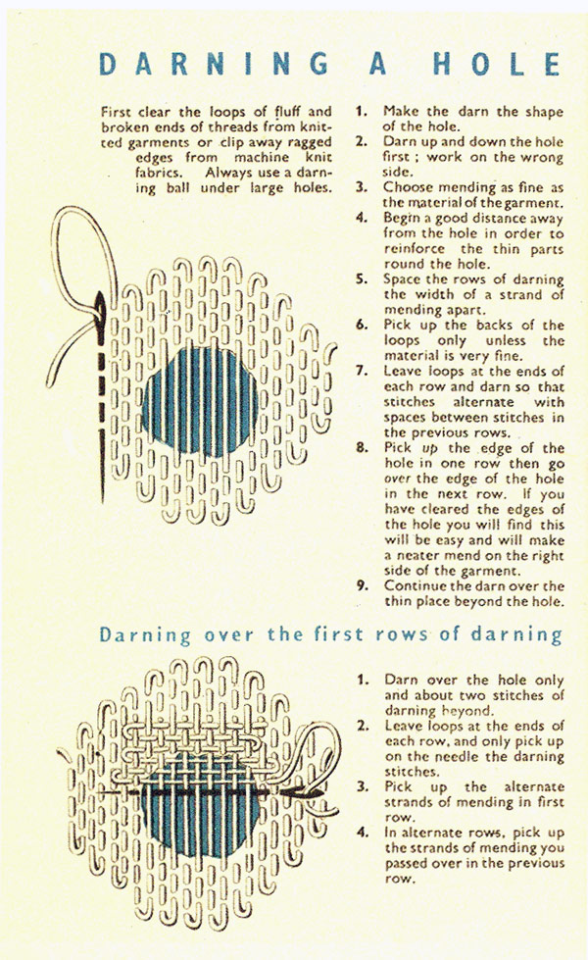
Darning:
Darning is a technique used to repair holes in fabric by using running stitches to weave extra fabric over the hole as to fill it up again. While traditionally darning is done in an invisible way by using the same colour of thread as your fabric, you can also use contrasting colours to accentuate your fix. Check out this written tutorial on darning by TheSpruceCrafts.
(Image source)
(Image source)
Conclusion:
Visible mending is a creative way to fix up your clothes and give them some personality at the same time.
You should be proud of the fact that you took the time and learned the necessary skills needed to mend your clothes! Show off what you did!
A fun side effect of wearing these obvious mends is that people will notice them. They'll remember your fixes the next time they're faced with a hole in their wardrobe, and it will make them more likely to try it for themselves.
These are just a few ways to visibly mend your garments. Want more inspiration? Check out Pinterest or r/Visiblemending on Reddit.


Two job-hunting resources that changed my life:
This cover letter post on askamanger.com. A job interview guide written by Alison Green, who runs askamanager.

I made a starcraft themed chess set for my boyfriend
Fruit will last 3 weeks longer….

Why You Should Keep Fruit In Mason Jars Instead Of The Containers They Come In…….
When you get your fruit home from the grocery store, the first thing you should do is remove it from the plastic containers they’ve come in and recycle them. Next, clean out your sink and fill it with water (you could also use a large bowl). Then, toss in a few tablespoons of distilled vinegar. You’ll then want to submerge your fruit in the water and let it soak for about 10 to 15 minutes. The purpose of this is to get rid of any mold or bacteria on the fruit which is what causes them to go rotten more quickly.
Once the fruit has had a nice soak, remove it from the vinegar water, transfer to a strainer, and rinse with cool water. Leave the fruit out to dry on a tea towel or paper towel. Once dry, transfer the fruit to mason jars and seal up those lids. This is the best way to make your fruit last, particularly berries, which tend to be very prone to mold and bacteria buildup.
And that’s it! Incorporating these few extra steps into preparing and storing fruit can help you eliminate food waste, save money, and keep your fridge stocked with fresh produce for much longer.
i mean, maybe this is my inner “survivor of child abuse” talking, but I am not going to tell abusive parents that they’re bad at bringing up their children without a bullet proof plan with regards to how I could protect my student from the emotional and physical backlash of that meeting.


lol I am in such a stressed-out blind rage today from insurance bullshit that I wrote up a glossary of health insurance terms (things like deductibles, premiums, and copays) because all the free guides online are unnecessarily complicated and the only way you can squeeze a dime out of these bullshit companies is to understand their overly-complicated policies. give em hell