Here's A Tuto
Because of the bots taking all fics to feed it to AI you want to lock your work for registered users only but have too much fics to do that one by one?
FEAR NOT. You can edit in bulk!!
Here's a tuto
Firsr, go to your works and tap on "edit works".

Tap on "all". This will select every single fic you posted.
Then, tap on "edit".

You'll get to this page, so scroll aaaall the way down.

And boom. You get to all the possible changes. Now scroll to "Visibility". Now tap on "Only show to registered users" and finally, tap on "Update all works".


They'll ask you if you're sure, so say ok.

And boom! Your edits were put through !

And now your works are only available to registered users.

.
Reminder that if you have an AO3 account, you can give away invitations to others so they don't have to go through the wait of the normal registration.
More Posts from Lokisbur and Others
Heaven is segregated by cause of death. All heart attacks together, all shark attacks together, etc. You die and appear in a nearly empty room. A tired old man looks up at you and says “Finally! Someone else! It’s been ages!”
I have recently received another ask about my canvas pulling and since I've been thinking about making a serious tutorial for a while now, I took the opportunity to take some pics and vids while finishing the tree. Do please enjoy :3
1. Why pulling out canvas at all?
Primarily, this is a fantastic technique to apply cross stitch patterns directly to the item you want OR to make patches from old jeans, like this one:

With small patterns I usually don't bother to sew the canvas prior to embroidering, like with the pupper above. In case of the bigger patterns, I usually sew it lightly on the edges just to keep the canvas in one place. The more stretchy the material type is, the more important it's going to be to keep it in place.
2. Why not use a soluble canvas?
I'm sure you can and that they'll be as successful as the regular one 😁 However, as I mentioned in my previous posts here and here, I prefer to err on the side of cheaper, hence the tutorial.
3. Okay. I'm convinced - I even have a pattern embroidered on! What's next?
With small patterns (like the doggo earlier) it's going to be pretty easy. You just pull the threads one by one - preferably starting on the thinnest part of the pattern - and you may not even need the pliers. The fun (?) is with the large pieces, because the canvas has on average quite fragile threads and they like to break. Note - the canvas I'm using and I suppose most of the existing canvas types, will have four threads per one embroidery row. It's usually easier to pull one first and then the other three, bit that may vary when, for example, you managed to pierce the thread during stitching phase earlier 😉
If you were already careful during the stitching, you paid extra attention to embroider EXACTLY between the canvas threads and avoid piercing them at all. There are two benefits to that being extra careful: one, it's easier to pull it out later; two, the stitching gains an extra precision to it (and it looks great!). I recently discover that the round tip needle is making it much easier and if you're interested, there's a separate post about it as well!
On to the process! You can see from the pictures how I started with cutting out a piece of canvas that I can later reuse for something small (recycling is my hobby 🤷🏻♀️). I also pulled loose threads from around the tree:

Next part was to clean up the trunk and the grass on the right:

I then cut off the excess to avoid the threads tangling and slowly moved to the sides of the leaves on right and left:


You'll notice that the last photo has the thread pulled halfway through the pattern. That's because on this stage it's usually impossible to simply pull the thread out - even with the pliers it is just going to break off. I use a needle to pluck it from between the embroidery like this:

If you're more of the visual learner, I made this vid that I hope explains the process in more detail. You'll notice that I'm using my fingers and not the pliers here, because it's faster than to switch between tools.
And finally, when you're left with single direction threads like these, it's just a matter of pulling them out one by one.

And that's it! The final product looks clean and neat, AND you will notice that without the canvas beneath it's also getting a bit of volume that looks cool (and helps even out small mistakes you may have made along the way).


Thanks for reading this far! Let me know if there's something else I forgot to explain 😊

Editing Checklist
Editing Software:
StyleWriter 4 is fantastic. It’s an add-on for Microsoft word and has a 14-day trial period. It goes through your text, picks out “glue words”, misspellings, long sentences, homonyms, passive tense, shows your reading grade level, and more.
Editminion *FREE* checks for adverbs, weak words, passive voice, cliches, and homonyms among other things.
Pro Writing Aid is another online editor. It is mostly free, but offers more features if you pay.
AutoCrit offers free analysis for under 500 words, otherwise you have to pay for more text and more editing features.
Paper Rater offers a free service for editing, but it is designed for essays.
Formatting Checklist: This follows the general guide of formatting a manuscript in Microsoft word. However, some literary agents and editors have their own requirements.
Under the paragraph option, change the special indentation to first line at .5”. Change to document to double spaced.
There should be no spaces between paragraphs.
When showing a scene break, center # on a blank line.
Font should be easy to read. Courier New and Times New Roman are preferred at size 12.
All margins should be 1”.
Start chapters on a new page and put the chapter title 1/3 down the page. Write the chapter like so: CHAPTER ONE - CHAPTER TITLE. Press return 4 - 6 times before starting the text of the chapter.
For the header, put YOUR NAME/BOOK TITLE/PAGE NUMBER in the upper right-hand corner. Start this header on the first page of the first chapter.
The cover page of your manuscript should have your name, word count, and contact information in the upper left-hand corner.
The title on the cover page should be in all caps. Your name should be underneath in all caps. If you use a pen name, write YOUR REAL NAME (WRITING AS PEN NAME).
At the end of the manuscript, start a new page and write END.
Self-Editing Checklist:
Spelling:
If you are using Microsoft word for your word processor, use the spell check. After that, go through the manuscript line by line to make sure everything is spelled right. You may have used “form” instead of “from” and skipped it because Microsoft word did not see it as misspelled.
Printing out your work or viewing it in another way (such as a pdf on an ereader) helps find these mistakes.
Beta readers can find what you missed as well.
Use editing software to check homonyms or look up a list of homonyms and find them in your document using ctrl + f. Check these words to make sure you used the right spelling.
Grammar and Style:
First use Microsoft word’s grammar checker, but be aware that it is not always right. Check grammar girl if you are unsure.
For dialogue, you can always pick up a professionally published book and look at how the dialogue tags are used, where commas are placed, and when other punctuation is used.
If you’re in school and your English teacher isn’t too busy, have them take a look at it.
Look out for prepositions. Most of the time, you can omit these words and the sentence will still make sense. Beginner writers use a lot of these in their writing and it slows the flow.
Check for adverbs. You’d be surprised at how many you use in your writing, sometimes up to five a page. Using a few in narration is okay, but only a few. Delete adverbs you find, especially those that end in “-ly”, and rewrite the sentences in necessary.
Delete gerunds and forms of “to be” if writing in past tense. Instead of “were running”, write “ran”.
Check subject-verb agreement.
Use correct dialogue tags. People don’t bark their words. They shout.
Two digit numbers should be written as words (twenty-seven) while numbers with more than two digits should be written with numbers (123).
Avoid passive verbs.
Vary sentence length.
Show with the five senses rather than telling.
Most of the time, you can delete the word “that”.
Avoid using “unique” or “significant” words too often.
Consistency:
Make sure all your font is the same size and type.
Make sure you have no plot holes. Use the comment feature in Microsoft Word to track these plots.
Make sure your time line is consistent.
The tone should fit the scene.
There should be one POV per scene. Unless you’re a brilliant writer and can pull off third person omniscient.
Verb tense should be consistent.
Keep track of the details you release of people, places, and things. The reader will remember if in one chapter you say your protagonist has blue eyes and in another you say green.
Pacing:
The whole book should flow in and out of fast paced scenes to keep your reader interested and slow scenes to give them a break.
The middle should not “sag”.
Sentences should flow smoothly.
Plot:
Keep track of all your plots and sub-plots. Readers will remember them.
There should be a beginning, middle, and end.
Is the initial problem at the beginning of the manuscript?
There should be at least one antagonist. This does no have to be a person.
Is there enough conflict?
There should be a resolution.
All scenes should have something to do with plot.
The climax should be the most exciting part.
Character:
The protagonist should change by the end of the book.
Make sure all characters who come in contact with one another have some kind of relationship, whether good or bad.
Characters must have motivation for everything.
The protagonist must want something right from the start of the conflict.
The protagonist needs to be captivating. The readers wants to root for the protagonist. This does not mean the protagonist needs to be likable all the time.
The readers likes to relate to characters. Make sure your characters are diverse enough that readers can identify with one.
Know who your protagonist is. The main character is not always the same. For example, Nick in The Great Gatsby is the main character, but Jay Gatsby is the protagonist. This is important to know while writing your query letter.
If you can delete a minor character from a scene and nothing changes, then delete that character.
Sometimes you can make two minor characters one without losing any essential parts of the story. If you can, do this.
All characters react and act.
Each character has his or her own life.
Dialogue:
Dialogue should be believable. Read it out loud.
Don’t go overboard with phonetic spelling if a character has an accent.
Dialogue should be informal and natural. It does not have to be grammatically correct.
Prose:
Avoid purple prose. I’ve never met anyone with “emerald eyes” or “hair of fire” (except for the Flame Princess).
Don’t use too many adjectives.
Avoid cliches.
Other:
Don’t info dump. Pace information through dialogue and narration.
The first sentence should spark interest, or at least the first three. If it does, the first paragraph should be the same. And the first 250 words. The goal is to get the reader past the first page.
Let your story rest. When you’re ready to edit, start at the end. Writers tend to get lazy at the end of their story whether they are writing it for the first time or revising it after revising the rest of the story.
Make sure your manuscript is within range for your genre’s word count.
I made one version of it on Redbubble and it seems they won’t take it down for now so if you want it here it is! If you want another version tell me, but it might take some time since it’s my exam period.


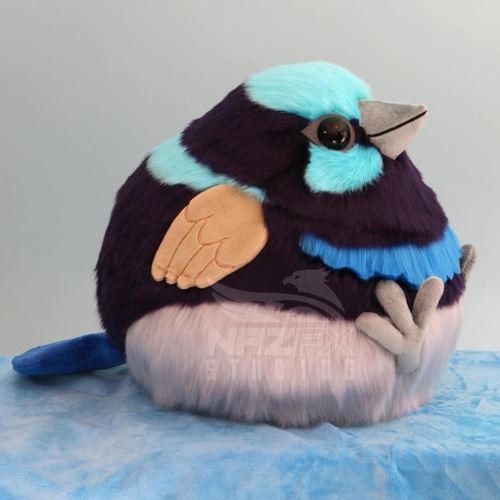


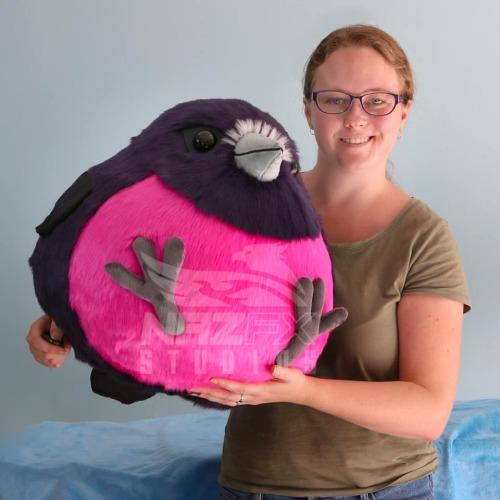
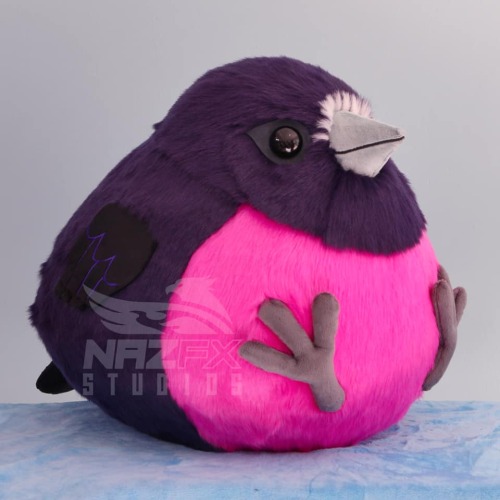
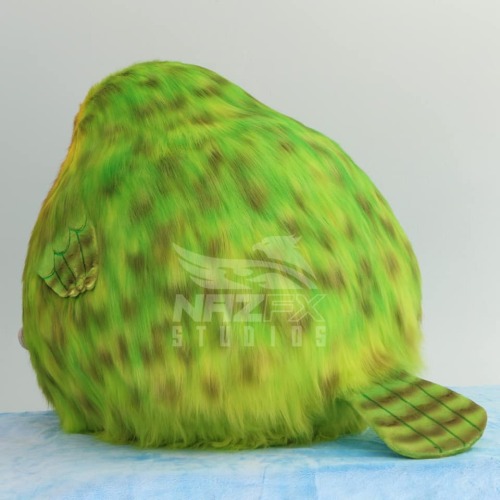


Giant plush Borbs from NazFX Studios
Tested the assembly with two pieces and ooooh boy hahaha omg
So I have thrown myself into a huge project, which is to make a plaid for my mother


This is the finished plaid from the creator and all the squares, half squares and quarter squares I have to do.

I've done all that so far, which corresponds to the four corners, all the big borders, half of the small borders and one baby square.
I'm doing it using yarn my mother wanted, which is a mix of cotton and merinos wool. There's 10 colours total but I'm not using the same as what is shown in the pattern.

Forgot to tell y'all
But I've finished that dang thing!!!!
So I have thrown myself into a huge project, which is to make a plaid for my mother
This is the finished plaid from the creator and all the squares, half squares and quarter squares I have to do.
I've done all that so far, which corresponds to the four corners, all the big borders, half of the small borders and one baby square.
I'm doing it using yarn my mother wanted, which is a mix of cotton and merinos wool. There's 10 colours total but I'm not using the same as what is shown in the pattern.
Why did I write so much stuff?????
Making a drive folder and related spreadsheet of my fanfics so y'all can ask me to have access to them if you don't have an AO3 account (since I locked all my fics for registered users only)
Me: this apparently will be a short fic
Also me, an hour later: apparently not
-
 autolenaphilia reblogged this · 2 years ago
 -
autolenaphilia liked this · 2 years ago
-
 jjeremysstash reblogged this · 2 years ago
 -
jjeremysstash reblogged this · 2 years ago
-
 lokisbur reblogged this · 2 years ago
 -
 ao3-helper reblogged this · 2 years ago

xey/xem French Don't be fooled, I'm a platypus, I don't much stuff (art side account)
288 posts