Ref - Blog Posts
ok so yes i know that stimmyvillain did a tutorial on this but theirs was done in photoshop! And this one’s gonna be in Krita.
What’s so good about Krita? It’s free!! And it’s not as confusing in my opinion. So!! Let’s get started!
Find a texture or a picture you want to work with! For this tutorial I’m going to use this cute marshmallow one.

Press Ctrl+N to create a new file or just do this.

Something like this will pop up. Just set it up like the picture below and click “Create”.

Cool! Now you have a canvas ready for use. Now copy and paste the picture onto the canvas by just using the Ctrl+C Ctrl+V method.

What’s that?? It looks all weird!! Well, don’t worry, we’ll fix it!

This tool lets you resize the image. Just hold shift while resizing it so it doesn’t change the dimensions!

Now that you’ve got it resized, use this tool to move and position it however you like. Now let’s move on to the text!

Choose the color you want your text to be in. The text tool in this is either pretty primitive or I’m just too dumb to use it but ‘til now I haven’t been able to change the font color when the text has been written.

Use the text tool by dragging a vertical line as big as you want your text and write it.

To change the font, simply select the text and change it in the “Tool Options” tab. I use the font Orange Kid which is the EarthBound font. It can be installed here.
So yeah you can position the text however u like after then and whatnot. Then you just save and you got your banner.

U can show me the banners u make using this tutorial by tagging me or whatever. I’d love to see. Bye now.
Do you have any tips for artists who are trying to start creating comics(i ask this because your comics are GODTIER and i wanna try making some comics myself)
😳//// thank you!! i'll try the best i can but i'm there are more resources out there if these don’t work for you
-paneling i'd say at most try limiting it at 4 rows of panels a page// you can go over this (i have) but just start small! then feel free to grow from there ^^

-don’t worry about backgrounds! unless you need an establishing shot for setting there really is no need to hassle over it. i usually get around this by adding "mood lighting" or a simple pattern ^^ (even the official obey me comics barely use bgs!)

- make dialogue guide the eye try to make it flow! it helps readability if there's a lot you want to get out

-b/w vs colour if you’re going the b/w route don’t use too many shades of grey!! keep it simple since it's already a limited pallete

if you’re gonna use colour, it's really a free for all but try to do what's easiest for you as a start ^^

studying + reading manga/manhwa/webcomics is also a good way to develop! if you like the way something was layed out try to emulate it in your own style // hope this helps! +good luck!! 💪🏿💖


Hii! just found your blog nd your work is so beautiful and exquisite. It's delicate and the colors are so warming, I love it!! casually found an ask about college major and its helping me a lot, tysm for share your experience. I don't have the privilege to go to college but I'm working really hard for it!! Ur response gave me so much serotonin to keep going!! I just have one question, if you're okay with it ofc! How exactly you create good illustrations fast? I'm struggling a lot with this one
Thank you so much!! I’m so glad my college experience is helping you too. I love being a serotonin boost!
A lot of learning to create good illustrations fast is having the pressure of working under a deadline. In college, I often had to complete 5 full paintings a week, on top of schoolwork and a 20-hour a week job.
You start to realize what to keep and leave out, like are somewhat forced to let go of perfectionism and just power through. But, here are some tips too! Some are style-specific, but they’ll at least give you a few ideas to pick and choose from!
Working with minimal layers (traditional or digital), this allows you to focus on doing 1-3 really good paintings that come together to create your piece, instead of thinking of, say, 20. This is style-specific, but if it helps my watercolor work is always a max of three layers!
Use a timer system (I like the tomato timer method)
Set specific work hours (I only give myself four hours a day, so it’s taught me to be really focused on efficient)
Create thumbnails first (if you’re making a colored piece, make them colored!) These are a lot quicker to complete and they work as a guide, so you can power through your final painting. They also help your illustrations look better composition-wise!
Use larger brushes (this is really helpful with watercolor). You can get super detailed even with a large brush, as long as it has a good point.
Keep practicing basics too! (I sometimes slack of this, but I did it a lot in college). The sharper your skills, the higher chance your first or second sketch will look how you want it to.
Thumbnail examples btw! First image is a thumbnail, second is the finished painting, third is the finished tarot card (some small digital edits made too). This and the timer method are the most important for helping me work quickly.

I really hope you find this helpful! :D
P.S. If you want to support my artwork, you can buy dog tarot prints right here in my shop!


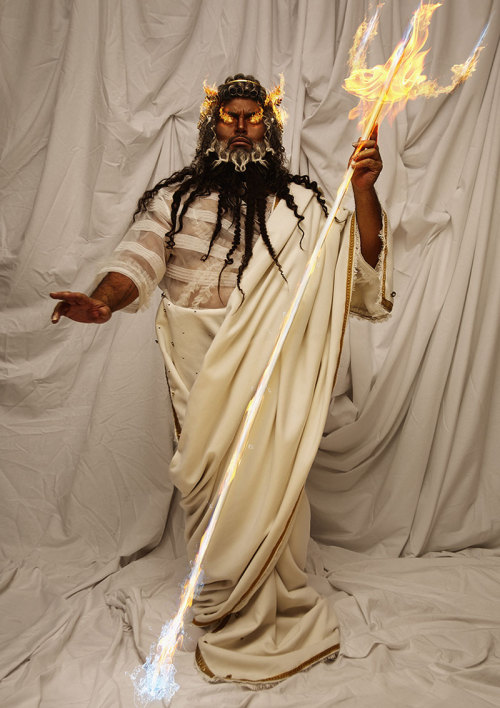
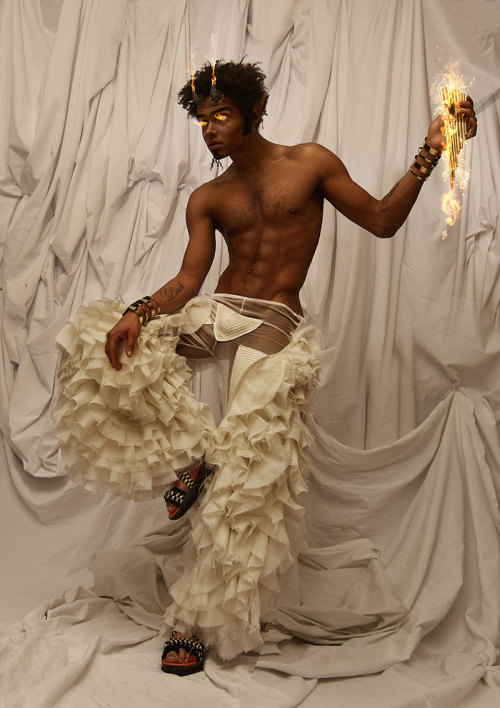

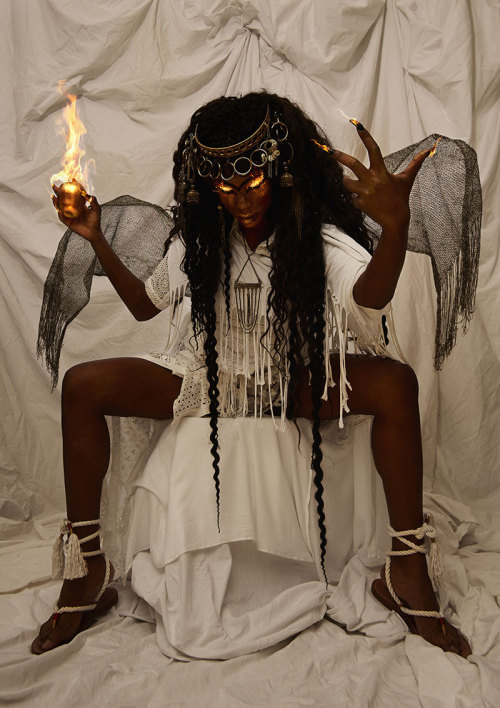
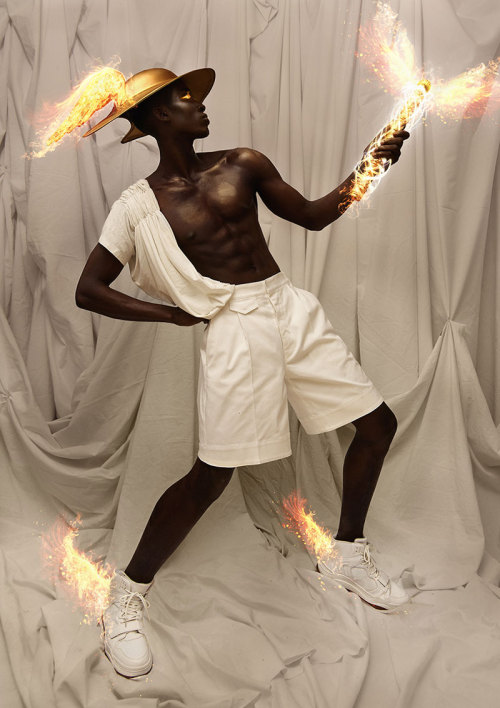
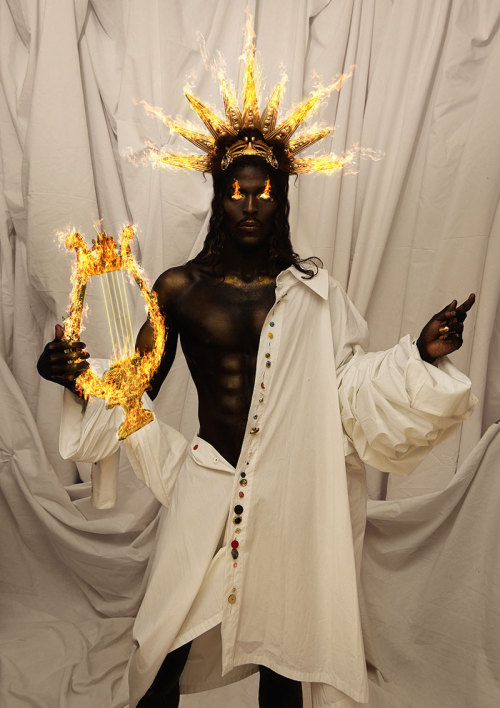
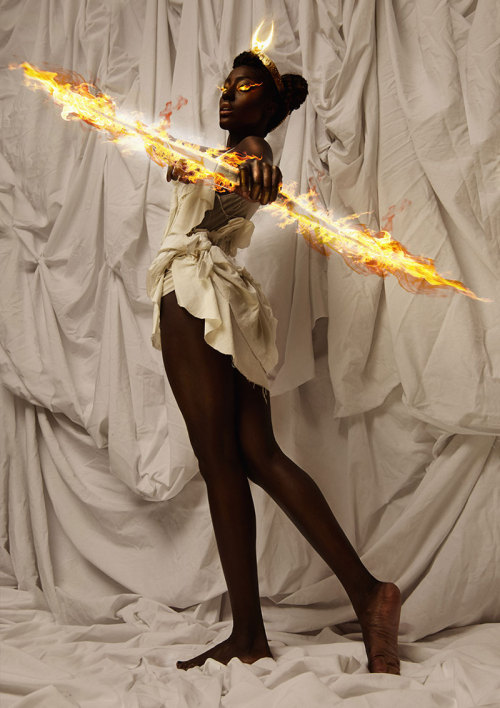
From Olympus
Photo: Ana Martinez
Styling and Creative Direction: Mario Ville (Kattaca)
Makeup design and make up artist: Lewis Amarante for Kryolan and Pankr0
Makeup and hairdressing: Sergio Jiménez
Models: Ricardo Nkosi, Mary Ruiz, Lewis Amarante, Aya Gueye, Juana Mum, Karina Soro, Ruben Buika, Virginia Buika, Isabella Menam, Oliver Lewis, Megane Mercury, Mendes Vieira, Claudia Duharte, Taylor Oscar Ruiz, David Durrant, Marina Gomes, Oscar Chibuike, Guille Gibbs, Lil Bambina, Elian Coiscou and Tigi.
ITS HERE
wtf is going on with the trains rn bro,,


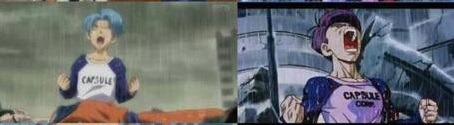
i love love love when artists put a bunch of effort into like human anatomy and facial features and light rendering and drawing fabric folds and shadows and texture and then when they draw a gun they do this


*crawls out of my cave and hands you gway images i've been collecting then scurries back into the cave never to be heard from again*


Sea Shanties 101: Let's explore
TYPES OF SHANTIES
If you've any experience in sea shanties, you've probably noticed they don't all sound the same. Some are slow, some are fast, and some are just downright sad! Well there's method behind the melody, and I'm here to tell you all about it!
A shanty frequently contains a CALL, which is what the shantyman would sing out, essentially the verses of the song, and the RESPONSE, which is what the men would sing back. For example in Haul Away Joe: the call is "Louis was the king of France before the revolution," and the response is "heave away, haul away Joe."
One of the first things to keep in mind is that shanties were used most frequently during tasks that required most of the crew. I'm now going to separate these types of work shanties into categories:
CAPSTAN SHANTIES: these shanties were used for repetitive work that was sustained, such as raising the ship's anchor at the capstan. Examples? Randy Dandy-Oh, Drunken Sailor, Eliza Lee, Barrett's Privateers (though this was written long after the age of sail!)
HALYARD SHANTIES: sung during tasks that took a very long time and required a break for a breath before the men started up again, such as hoisting a sail. Examples? Blow the Man Down, Leave Her Johnny, Hanging Johnny (Johnny really took the piss huh)
PUMPING SHANTIES: let's hope you didnt have to do a lot of pumping! Wooden ships were prone to leaking and so pumping out the water was necessary but tiresome work below decks. Examples? Santiana, Pump Shanty (surprise there)
SHORT-HAUL SHANTIES: for quick work, like shortening sails! Examples? Haul Away Joe, Paddy Doyle's Boots, Haul on the Bowline
There's some of our task shanties! Now why don't we go below and see what our off-duty men are getting up to?
Why, they're singing FO'C'SLE SHANTIES! These shanties are stories of life at sea, the work they'd done, the places they'd been, they can tell you a lot about a sailor's life. Examples? Rolling Down to Old Maui, Ben Backstay, All for me Grog
Fun! How about those far away in the polar seas hunting whales? Well I'm glad you asked because this is where we encounter WHALING SHANTIES! And yes, you guessed it, this is where Wellerman comes in! Other examples include Bonnie Ship the Diamond, The Greenland Whaler Fisheries
Now of course the most important rule of sea shanties is to have fun with your buds! Be sure to tell everyone you know about your newly-acquired shanty knowledge!


I'LL be honest, I wanted to do more of these, sorta like a back of the book thing. But I've been busy. I wanted to put them on the back burner. But I have a feeling I won't have time for her and Neill for a'bit longer.


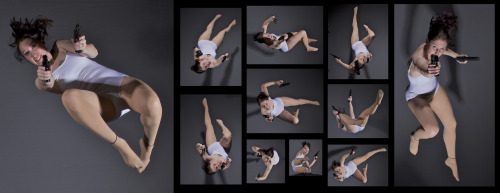
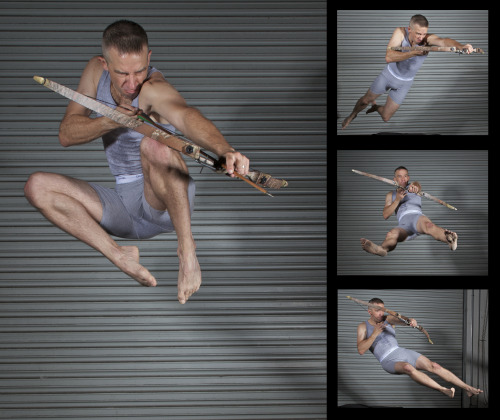
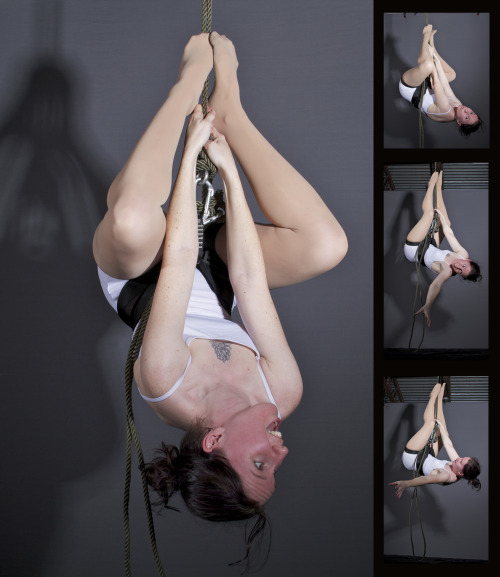
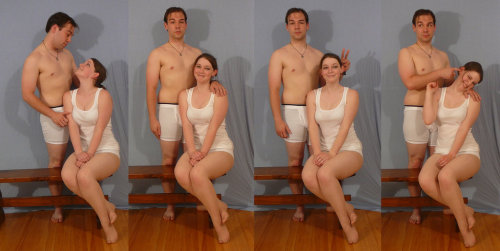
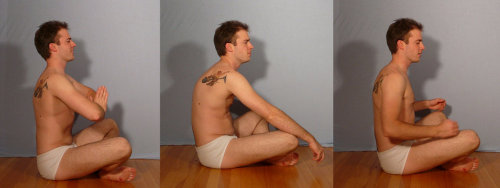
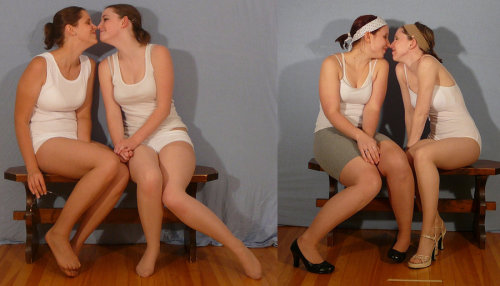
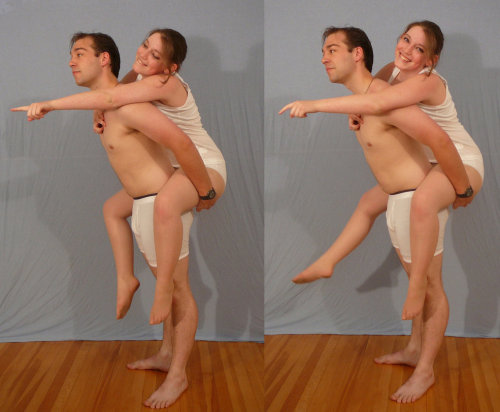
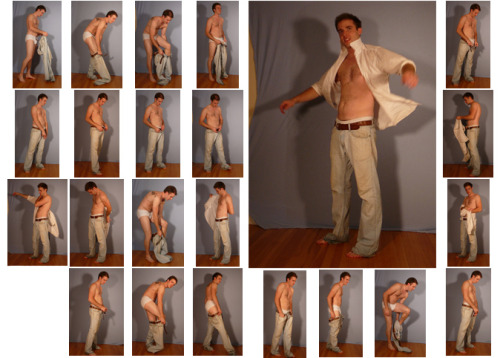
SenshiStock’s gallery consists of millions of pictures that are free to use as reference.
General Drawing Poses Sit and Kneel Dramatic and Reaching Drawing Poses Magic and Hogwarts Drawing Poses Staff Weapon Pose Reference Hammer, Axe and Bat Pose Reference Sword Weapon Drawing Reference Small Bladed Weapon Pose Reference Gun Weapon Pose Reference Bow and Arrow Archery Stock Foreshortening and Perspective Poses Dynamic Flying Falling Action Poses Deafeated or Laying Drawing Poses Magic Crystal Magical Girl Wand Weapon Transformations and Dance Cards Back Pose Reference Pin Up Inspired Poses for Drawing Performances Poses Life in General Poses Fights and Fighting Pose Reference Leaning Poses Classic Sailor Senshi Poses Wings Sailor Moon Villains Pairs Romance or Couples Pose Reference All the Male Stock Hanging Stock Drawing Reference Three or More Groups Instruments Mirrors Whip Technobabble


Hi! I was wondering what program you use to make your animations. I would like to make some myself. If you could do a tutorial it would be greatly appreciated!
Hi there! I use TV Paint for all my animations. I don’t consider myself an expert of animation or TV Paint, but Toniko is a very talented animator with great tutorial videos- I recommend you check out his site. Good luck with your animating! :)
