Latest Posts by daisy-zam - Page 2
Even though they arent necessary I use at least one of these during my study sessions
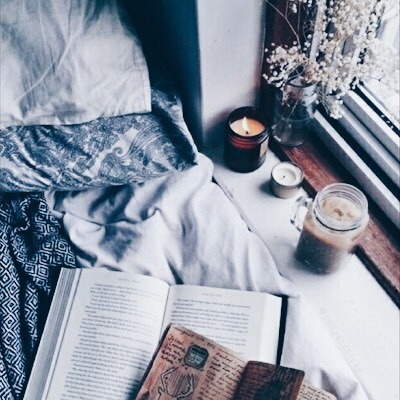
Some Unnecessary Study Necessities
A Good Place To Work:
1. Starbucks. The smell of coffee and the quiet chatter make it very peaceful while working. It provides some nice white noise and you can get coffee and tea. Perfect.
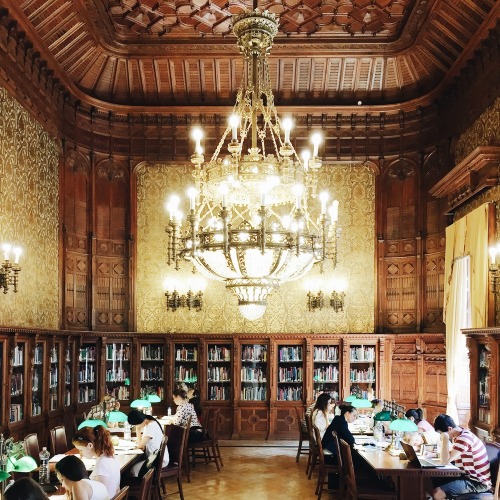
2. The library. Known for being quiet which can help with focusing. They also usually have printers and you’re surrounded by books for researching if need be.
3. My backyard. Not my backyard specifically, but sitting in the fresh air while doing homework can be relaxing. If you have outdoor tables/furniture, even better!
4. A friends house. Be careful though. A friend can either help you focus and you can work together, or they can be your biggest distraction.
5. My living room. You don’t have to leave the house the change your study space. Just sit at your dining table or couch and get out of your room for a bit.
Snacks:
1. Fresh fruit. My personal favorites are apple slices, grapes, raspberries or cherries. They’re mess free, and good for you.
2. Nuts. I love cashews. They’re super easy. You can even find them it small, individual packages to throw in your bag if you’re leaving the house.
3. Popcorn. Just plain ol salted popcorn. Mmm
Noises:
1. White noise. My go to. you can find playlists of white noise on Youtube, Spotify, or Pandora stations. There’s also an app called Tide which acts as a Pomodoro timer with white noise in the background.
2. Piano. I listen to the Piano in the Background or the Piano Bar playlists on Spotify because there’s no words to distract me.
3. Movie soundtracks. I like the ones from superhero movies because they put me in a kickass mood.
Of course you don’t really need snacks or background noise or whatever but it can make studying a bit more enjoyable. Just do what you need to do to get stuff done.
hey do you know much about creating icons? i was just wondering how i could make my own and how people get the cool mildliners and notebooks as their icons

I’ve been getting asks about how I make my icons, so I figured I’d make a mini masterpost on it. These are the basic steps I go through when making an icon
there are tons of different icons you can make: check out my icons tag for inspiration!
what I use: Adobe Illustrator canva. If you’re broke or too scared to torrent this is probably your best bet. You have to sign up, but it’s completely free
Create your document: any size bigger than 400x400px is probably fine, but make sure that it’s a square shape (do this by going to create a design → use custom dimensions)
a ‘lil note: canva does this annoying thing where if you’re zoomed in or out all of the shapes will be slightly off. Unless it’s at 100%, the preview you see won’t be accurate, which is annoying when you’re making something with a lot of shapes
find a reference image: whatever your icon will be, a pen, a book, a calculator, a reference image will help immensely with accuracy and amount of effort going into your icon (I used this photo for the leuchtturmicon)
background color: I usually start with a light grey so that it contrasts with al the color I’m using in the icon, then I change it at the end if i need to (do this by going to background → document colors)
create your icon!: easier said than done, obviously. canva doesn’t have a pen tool, so you have to take the shapes they give you and build on them. Notebooks are probably the easiest; just use rectangles, and you’re good. For more complex shapes, you have to take several shapes and put them together. If I was making a notebook with rounded edges on one side, I would use a rectangle for the base then put a rounded rectangle overlapping one side that makes no sense I’m sorry It’s often really tedious and a bit complicated to test with different shapes, so message me or send an ask if you have any specific questions. (shapes and things are in elements → shapes)
logos and things: because canva is so limited with shapes, theres basically no way to make company logos. What I do is google search the logos then drag them into the uploads box on the left side of the screen. Then I just add them to the icon (that’s what I did on the rhodia and muji notebooks in this and the kanken in this). If you can’t find the icons in the right colors or with transparent backgrounds, put them in LunaPic and go to edit → transparent background and adjust → color changer.
color scheme: I’m super lazy about color, and I usually use the extension Palette Creator to create a palette for my reference image and I use those. Tip for lazy people: light/low saturation colors are basically foolproof
add shadows: if you want to. Shadows add dimension, but they are also very tedious to do if you made your icon with lots of different shapes. There are two basic types of shadows you can make (these or the book icon in this).
add any other details you didn’t add before-compare your reference image and your icon
save your icon!!
and thats it! hope this helped at least some of you, and message me or send an ask if you need any more specific help
New Studyblr Intro
Hi im daisy! Before I go off explaining my studyblr id like to say I was putting this off for a while because I was very very nervous. Well anyways here we go! Age//14
Grade//9
Country//USA
Subjects// History, Geometry, Japanese
Inspo for making a studyblr// This one was hard to figure out but im going to try to sum it up. 1. Seeing all the amazing studyblrs 2. Wanting to study more often/ study in general 😂
Random facts about me// I play piano and the sax, im fluent in spanish in english because im a chicana( basically half mexican half american), i love photography, reading, drinking coffee, rainy days, and sweaters. Im also a Ravenclaw.
Studyblrs that inspired me// @studyquill @emmastudies @rhubarbstudies @wafflesstudies @eggystudy @thesmartstudies @mariapbtapia @studylustre @minimaliststudy @studyally @schoollifeandstuff @studynotepad @artemistudying @starcrossedstudying @cielstudies @aristotela @teaplusme @architstudy @idcstudies @typicalstudyblr @1minniemouse2
Books are the quietest and most constant of friends; they are the most accessible and wisest of counselors, and the most patient of teachers.
Charles William Eliot (via bookmania)

op. iii — hello, august

There are a ton of masterposts like this floating around, but you can never have to much advice for baby studyblrs!
Before we start, some studyblr terms + things: studyblr=study+tumblr (your blog) studyspo=study+inspiration (photos of notes etc) studygram=study+instagram studytube=study+youtube appblr=application+tumblr (college application blog)
this post probably answers any more questions than I can answer here
Step 1: create your tumblr
The most important step, obviously. Will you make your studyblr a sideblog or a main blog? Both have their merits:
a sideblog if you already have a main and don’t want to keep switching accounts
a main blog if your studyblr will be your main focus or you don’t already have a tumblr
Step 2: your look
This is basically your URL, your theme, and your icon. None on these are set in stone, you can change them whenever you want, but I like having consistency and it makes it easy for people to find you.
Tips for your URL:
make it related to studying~you can have things like stationery items, yourname+studies, anything! (probably a given but I thought I should say it)
make it short. coffeeandpens is easier to remember that the-boy -who-studies-ancient-greek-literature-257963. Of course there’s nothing really wrong with the second one, but it’s long and a lot harder to remember than coffeeandpens
make your URL the same on all your platforms so that it’s easier to find you
check out @studyquill‘s studyblr URL generator if you’re stuck!
Tips for your icon:
if you’ve gone through a few studyblrs, you’ll probably see that the most popular type of icons are vector icons. A ton of studyblrs have made free icons for the community (me included) and you can usually find them in the tag #studyblr icons and on @studyblr-icons
you can also find icons on flaticon (make sure you credit them somewehere!)
but it doesn’t have to be a vector! you can use a selfie, photos of your notes, a photo of a celebrity/something from a fandom you’re in, anything!
Check out these posts for more icon tips: 1 | 2 | 3
Your blog theme:
I prefer 1 column themes over multiple columns because it’s easier to read masterposts when they aren’t in super thin columns
don’t make your text super small (it doesn’t need to be huge but anything under 9px I think is too small for body font)
@roxiestheme
@neonbikethemes
@sorrism
@enchantedthemes
@acuite
or you can check out @theme-hunter and they have a million amazing themes!
Step 3: your content
Creating original content is hands down the best way to gain followers, but don’t refrain from posting because your notes aren’t aesthetic enough. No one will laugh or judge, and don’t be discouraged if your posts don’t immediately start getting notes. Post whatever you’re interested in and whatever you’re studying. There are (roughly) three types of posts to create for your blog: studyspo, masterposts, and graphics (and printables). Check out my studyspo, masterpost, and graphics/printables tags if you need inspiration.
Check out these posts for studyspo tips: 1 | 2 | 3 | 4 | 5
Look at this masterpost for masterpost tips
Step 4: getting noticed
Here’s the deal: we all want our posts and blogs to get noticed. It’s nice to get notes and followers, and there’s nothing wrong with that. That being said, it’s frustrating when your blog doesn’t grow as quickly as you expected, so hopefully these tips will help you:
the first post a lot of people make is an introduction post (check out intro posts I was tagged in for format ideas). They serve as a little about me and I love reblogging them!
a lot of studyblrs have tags that they track so if you use their tag (for examble #rhubarbstudies) they’ll see it and reblog it (look at this list for some studyblrs to tag)
use popular studyblr tags: #studyblr, #studyspo, #studyinspo, #new studyblr
post consistently. Posting every day will eventually add up to notes and followers, trust me.
Step 5: making friends
My studyblr friends are a huge reason why the study community has been so enjoyable for me. Making friends can be daunting, but it’s totally worth it
some networks: @homework-help-network @smallstudyblrsunite @studyblrindex @k-studynet @sapphicstudynet
my advice is to join a network with a theme and/or a group chat instead on just an index if you really want to meet people
some more posts like this: 1 | 2 | 3 | 4 | 5 | 6
Lastly:
Don’t be intimidated by the studyblrs with super aesthetic posts that get thousands of notes, they all started as new studyblrs. And maybe they’ve had their blogs for years, but literally every single studyblr has started off with 0 followers. What’s more, you don’t have to aspire to be those blogs at all. Perfect lettering and crisp lighting and a multitude of stationery is lovely, but don’t worry if you don’t have content like that. Your studyblr is about you and your journey. Good luck!
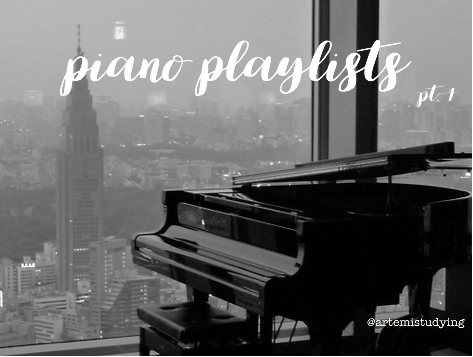
hello there! i love instrumental music so i thought i’d make a compilation of some piano playlists! have some snazzy fun ♥︎
classical period
beethoven
l. mozart
w. a. mozart
argerich
horowitz
rubinstein
ashkenazy
c. p. e. bach
j. c. bach
j. c. f. bach
w. f. bach
clementi
dušek
dussek
eberl
hässler
haydn
hoffmeister
kozeluch
lebrun
pleyel
reichardt
reicha
rosetti
salieri
sor
schröter
steibelt
vanhal
wölfl
misc #1
misc #2
misc #3
misc #4
misc #5
baroque period
bach
haessler
händel
alberti
couperin
galuppi
giustini
scarlatti
platti
romantic period
alkan
arensky
balakirev
baumfelder
bendel
bennett
berger
bertini
burgmüller
brahms
chaminade
chopin
czerny
fontana
liszt
rachmaninoff
schumann
tchaikovsky
wagner
misc #1
misc #2
misc #3
misc #4
misc #5
20th century
scriabin
debussy
schoenberg
bartók
prokofiev
messiaen
boulez
ligeti
ravel
saygun
shostakovich
sibelius
sorabji
stenhammar
misc #1
misc #2
contemporary
chin
clayderman
hoddinott
morawetz
wolpe
yiruma
crumb
charpentier
rzewski
m-a hamelin
rautavaara
e. carter
misc #1
misc #2
misc #3
misc #4
misc #5
misc #6
misc #7
here it is! hope ya’ll like it! if you have any suggestions/ feedback do send them my way!! happy studying!
x
last edited 24/5/17

10 Tips to Write an Essay and Actually Enjoy It
I still haven’t figured out how to sit across from you, and not be madly in love with everything you do.
William C. Hannan (via lovelustquotes)
Me 😂
My heart whispers Autumn but the calendar screams July.
Houses During the Fall
Gryffindor: climbing trees, jumping into piles of leaves, getting lost in corn mazes, face painting, building pillow forts, ripped jeans and combat boots, laughing loudly, rolling down hills, walking barefoot on cold floors, a mischievous glint in someone’s eye, roasted marshmallows
Ravenclaw: bedheads and fuzzy socks, pumpkin flavored coffee, reading by the fire, passing out on soft pillows and warm blankets, listening to rain, old music playing on a turntable, deep conversations, crunching leaves, foreheads against cold windows
Hufflepuff: bonfires and camping with close friends, big sweaters and fluffy scarves, drinking loads of hot cocoa, pumpkin carving, warm hugs, morning walks, smiling at strangers, holding hands, blue lips and pink noses, huddling close to friends, holding a warm drink, cuddling
Slytherin: watching old movies wrapped in a fluffy blanket, hot tea on cloudy days, pink cheeks from cold wind, knitted beanies and cozy jackets, stargazing on a rooftop, long sighs, flickering candles, misty mornings, reading old poetry, writing in a cafe, tired yawns


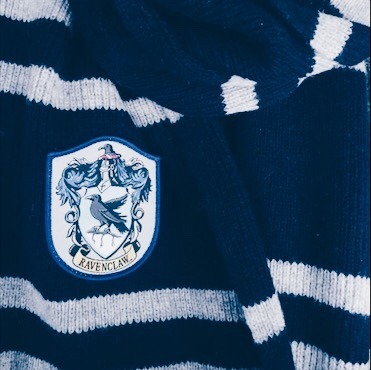


↳ ravenclaw + autumn
Im also looking to learn japanese so if your from japan or speak japanese that would be amazing but you dont have to.

Hi im Daisy Zamora. So lately ive been interested in finding some new freinds. Heres some info about me: Age- 14 Height- 5'1 (yes im that short 😒) Hobbies/interests- Reading, photography, hiking, playing piano/saxophone, drinking coffee, going thrift shopping, swimming (even though im terrible), video games, and anime. Extra info- Im shy, awkward, genuinely nice or at least im told, i stutter sometimes in awkward situations, i also am bilingual in english and spanish, and im normally the fun/nerdy/geeky girl.
My only request for a pen pal is dont be racist.
daisy-zam


Name mood board for Rin -Pastel


sneaky dates w tae ☕️


Mood board for a Taurus who loves trees 🌲 and cats 🐱
-Astro
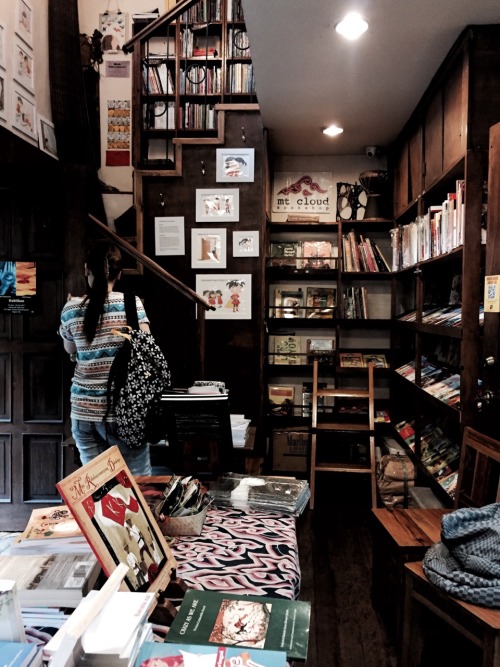

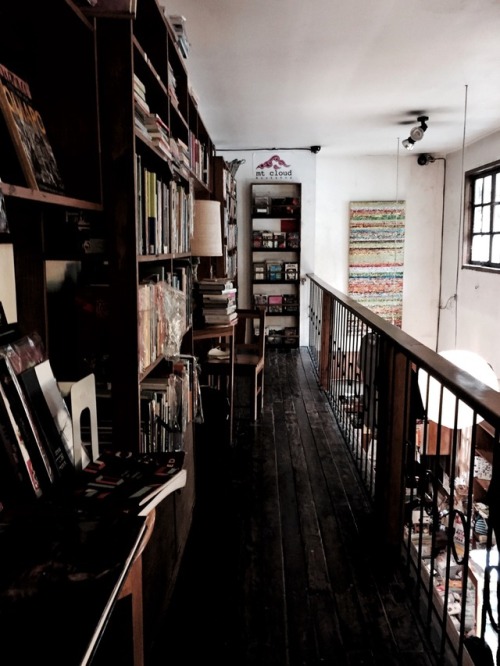
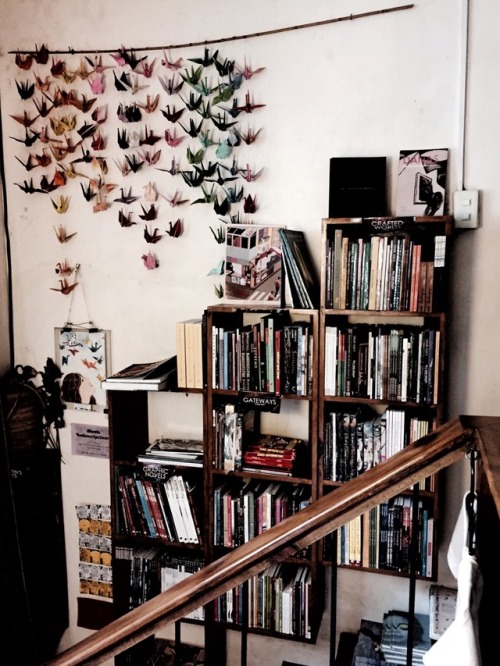
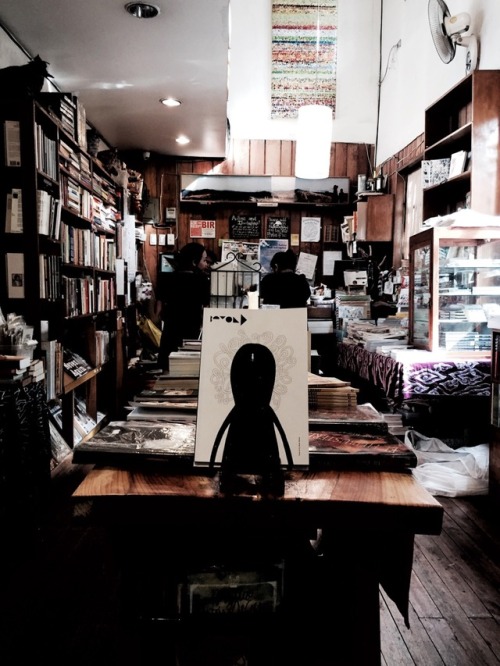

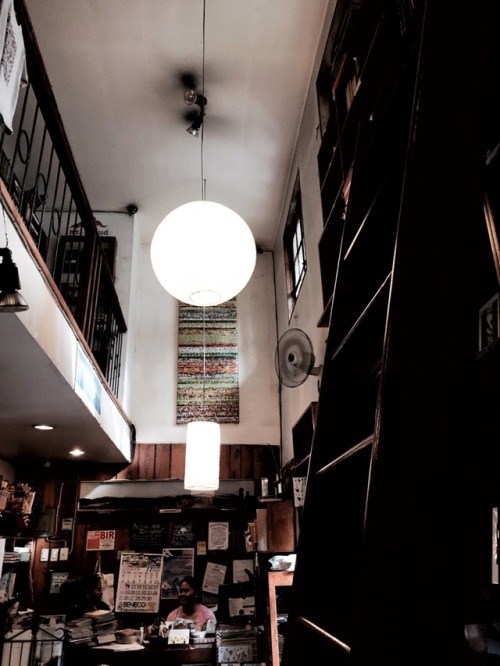
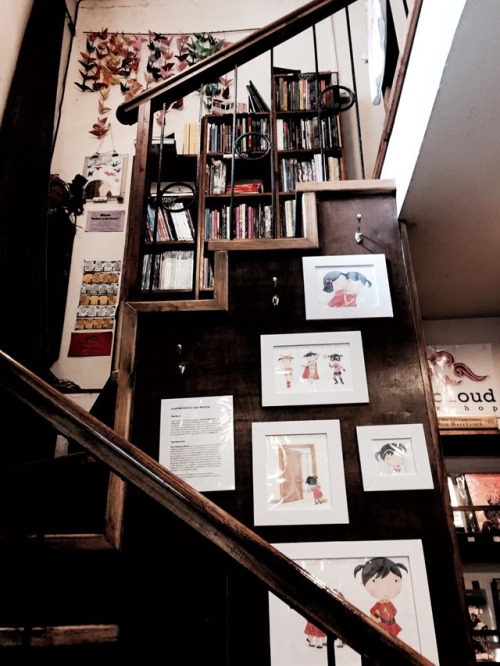
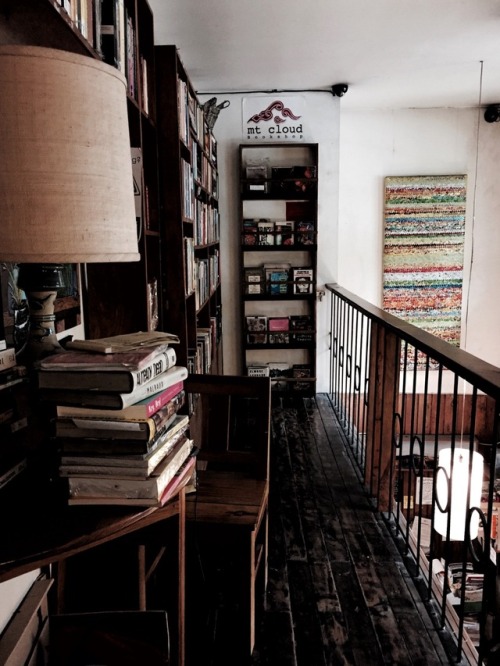
Mt. Cloud Bookshop in Baguio City, Philippines.


Hey, there! Someone recently asked me, “How do you make a moodboard?” It’s a tough question to answer, actually, because I wasn’t sure if the person meant conceptually (the process of conceiving one) or technically (the process of putting it together on a computer). So, I thought I’d make a masterpost covering both, as well as some tips on aesthetics.
Step 1: Conceiving of your moodboard
Sometimes people will make requests, and half the work will be done for you. They’ll request “Hufflepuff, doodles, tea, INFP, Virgo, travel” and you’ll know that these are themes/motifs/images that you should try to include. Alternately, you may have a more general feeling that you are trying to evoke through images: melancholy, for example. You may also have a specific aesthetic that you’re trying to achieve. ~Aesthetic~ is a tricky word and can mean several different things in varying contexts. “Brooding sad girl lyfe” could be an aesthetic, a cohesive visual goal. In this case, all the components of the moodboard would be contributing to this notion of a brooding sad girl and her lyfe.
Step 2: Finding pictures
Once you have an idea of where you want to go with your moodboard, it’s time to hunt for images! I like to surf the tags on Tumblr, and if I can’t find something that suits my needs there, I’ll turn to Google images. Remember to keep track of where you find your pics so you can give credit later (or even better: ask permission to use them).
Step 3: Making the thing
You can compose a moodboard by simply uploading photos to Tumblr and moving them around, or you could use graphic design software. I like to use Canva because it’s easy and free. It also allows you to save the moodboard as a single image. I’ll briefly go through making a moodboard with Canva.
First choose a size by clicking “Use Custom Dimensions”: 900 x 900 pixels is standard for square moodboards. You can also set the size using inches instead of pixels.

Then you choose a layout from the lefthand menu.

Next, load your pictures by clicking “Upload” in the lefthand menu. Once they’re uploaded, you can begin dragging them over to the cells. Double clicking a picture allows you to adjust its positioning in the cell.

When positioning the photos, I always like to keep in mind balance: of light and dark, of colors, of subject matter. I wouldn’t want two pictures of teacups next to each other. I wouldn’t want two pictures of text next to each other either. Balance is key. Glancing over it quickly, you should get a sense of a flow of images, with nothing too jarring or standing out. This will make for a cohesive moodboard.

My personal style is a little busier than most, meaning the images are more crowded and cramped. I find this gives the moodboard more texture and makes it more visually interesting. This is just my opinion. I still find minimal moodboards to be beautiful, too.
Step 4: Posting the thing
Always give credit where and when you can. And the more credit you give the better: if you know the photographer’s name–awesome! If not, then the blog where you found it should suffice. Some people believe you should ask permission before posting a photo to a moodboard, but often this won’t work in the interest of time. It’s actually a little bit of a controversial subject; many people practice crediting in different ways. This is just my suggestion. I also usually offer to take down a photo if the owner objects. I used all my own images for this masterpost and blurred out others to save myself the trouble :) You really should credit the owners, though.
I hope this was helpful. Message me with any questions or feel free to add on!


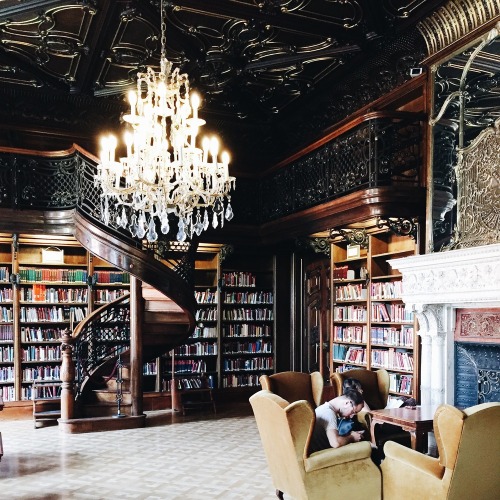
das Bibliothek, Olivier Martel Savoie


{16.2.17} some stationery loots i got recently!!! (⁎⁍̴̛ᴗ⁍̴̛⁎) most of them were on sale so i’m rly rly happy about my purchases aahh!!! (and i finally got more brush pens HEHE)

🙇 senpai

Lately I have received many DMs asking for advice on how to get noticed, how to get followers or advice on similar matters from people who have just a couple posts, if anything. So cheers on you guys for taking the first step, and I hope I can help you more throughout your journey! Now, onto the post: advice on how to start a studyblr.
Also, it’s going to be a long post. Therefore… Welcome to our GUIDE TO START A STUDYBLR
Keep reading
IF YOU'RE A STUDYBLR
please reblog this post, I’m looking for new people to follow and more people to talk to😄

As you all know the secret to all memorization is revision. Revising can’t always be done the night before unfortunately, but has to be scheduled. Sometimes I find scheduling my studies quite hard, especially during stressful times. Here are some resources that can help you with scheduling your studies.
Making a study plan
Study plan lay out (1) (2) (3) (4)
Prepare for finals week video
Study plan by an oxbridge student
Study plan by a med student
Schedule your school calendar
Creating long term study plans
Study plan printable
Ways of planning
Bullet journal
Passion planner
Choose the right planner
Weekly
Daily
Monthly
To -do lists
Minimalist planning
Balancing social life and studying in your study plan
Finding time to study
Save time during the week
Organizing your life
Balancing school life and social life
Managing a heavy workload
Make the most out of your day
When you have a bad day
Useful apps/web resources for making a study plan
App plan
Google calendar
Calendars 5
Forest
Wunderlist
Momentum
Omnifocus
Study apps
Other productivity tips
14 productivity hacks
Time management
Due vs do dates
Stop procrastinating
5 minutes for a more productive day
How to focus when a million things seem to happen at the same time
Productivity masterpost
The 2 minute rule
Pomodoro method
5 tips for staying productive
A question about productivity
Stay productive when you are sick

If you go to school/uni and have friends, this post is for you. Here are seven tips to help you balance school and social life. Read on.
Use social events as alarm clocks or deadlines for you to finish your homework, or any school work. If you’re going out with friends on a certain time, do everything you have to do before that certain time.
Know when you can actually do what you have to do. Don’t force yourself to finish everything because that can lead to frustrations that will mess up your work, leading to more work, which is counterproductive.
Use social events as rewards. It could be after you’ve finished exams, or if you have reached a goal. This is what me and my friends do. Even the simple act of getting ice cream after exams is a gift when done with friends.
Never go out a week before any exam. Dedicate that time to studying and reviewing. Nuh-uh. Gotta stay firm on this. You’ll thank yourself.
Use social events as a challenge to yourself. This is something I made up. I study before going out, and make flashcards or type questions. When I arrive home, I question/test myself. If I got at least 80% of the questions right, I reward myself. The reward depends on my current mood, really, but I usually reward myself with reading a certain number of pages of a book (not academic books, please, I need a break).
Make flashcards. You can review these flashcards even when going out. Just don’t overdo it. Your friends might think it’s inconsiderate. I mean, hey, you came there to have fun, put down those flashcards and actually have fun and relax. You had your time, and you’ll have more time for that later. Tip: don’t go out unless you’re done or unless you still have a lot of time on your hands. Be honest to yourself.
Commence a group study! For people who study better with people (not me), this is a great way to bond with your friends and your lessons. You can ask your friends about something you don’t understand. And, come on, if you’re with your friends, something fun/crazy is bound to happen. Just be careful not to procrastinate.
Words of wisdom senpai. 😊

I used to have a lot of trouble still do with procrastination and I realized that, in my new studyblr days, I didn’t know how to utilize my studyblr to help me and it was just another way for me to procrastinate and feel productive. If you can relate to this, you could probably benefit from this little dose of studyblr realness.
Don’t use your studyblr just for aesthetics: studyspo is great for inspiration and motivation, and it’s probably what drew you to the studyblr community, but it shouldn’t be what makes you stay. You won’t be able to take anything worthwhile from your blog if all you reblog is photos of beautiful notes. Mix it up with masterposts and printables and photos of “non-aesthetic” notes.
Don’t use methods that don’t work for you: if you absolutely cannot understand mindmaps but absolutely love the way they look, resist the urge to make them. You’ll only end up confusing yourself and wasting time. Only use note taking and studying methods that make sense to you. 90 percent of the time they’ll be things that you used before you made a studyblr. This isn’t to say that you shouldn’t experiment with different styles and methods, but only stick to what works for you.
Discipline over motivation: imho, the study community overstates the importance and effectiveness of motivation. Don’t get me wrong, motivation makes studying more enjoyable when you have it, but more often than not you don’t. In the end, motivation isn’t what makes you study every night, or stick with self studying a language. You have to discipline yourself to study when you don’t want to, or work when you’re tired. My old French teacher used to say “Don’t fall into the trap of waiting motiviation, and just do it” and I feel like that’s super important with this. (1, 2, 3)
Talking about studying isn’t studying: sort of related to number 3, don’t let your studyblr be another way to put off work. It’s all to easy to think “I’m blogging about studying; in being productive,” but it’s a dangerous thing to do. Studyspo is great, but don’t let scrolling through your feed become another method of procrastination.
Take photos after you study: or during, but not before. I used to spend so long taking pictures of my notes, that I wouldn’t have time to study them. I still take too long photographing my notes to take picture, so I’ve started using a pomorodo timer. After 25 minutes, I’ll use my five minute break to take photos. It’s increases my productivity so much, and I’m not sure how I ever functioned without that system.
Just get it done (and prioritize): honestly, sometime you just have to forget about trying to make your notes look pretty and just go for functionality over looks. Just let go of any studyblr ideals and do what you need to do. If you don’t have time to bullet journal and get your work finished, use an electronic calendar or don’t spend so long on your journal. Most importantly, be real with yourself. At the end of the day, you know yourself best, and you know what you need to do.
Good luck on your studyblr journeys lovelies, hope this helped!
xx

If you’re a stationery lover there is no doubt that you’re always looking for new places to shop because you can never have enough notebooks or pens! Buying stationery gives us all an illusion of productivity and who isn’t willing to pay for that? I’ve complied a list of stores I’ve come across and think deserve sharing! Just to note some of these do have physical stores or only ship to certain places. I’ve tried to find out their shipping policy but be sure to double check. Anyways, here is a list of all the stores (I’ve * my faves).
Stationery stores
Appointed (worldwide shipping)
Amazon (international websites)
Bando (worldwide shipping)
Bloom Daily Planners (US only)
Blue Sky Planner (US only)
Bricksxcastle (worldwide shipping)
Cobbery (worldwide shipping)
Daiso (US only)
Day Designer* (US and Canada only)
Ella Iconic (worldwide shipping)
Emily Ley (worldwide shipping)
Erin Condren (worldwide shipping)
Fox and Star (worldwide shipping)
Frank Stationery (worldwide shipping)
Glam and Paper (worldwide shipping)
The Happiness Planner (worldwide shipping)
Inky Co (Australian and New Zealand only)
Jet Pens (worldwide shipping)
Jo & Jody (ships to most countries)
Jot It Down* (worldwide shipping)
Kate Spade (ships to some countries)
Kawaii Pen Shop (worldwide shipping)
Kikki K* (worldwide shipping)
Knock Knock (worldwide shipping)
Leuchtturm 1917 (ships to most countries)
Little Paper Lane (Australia only)
Makadai (worldwide shipping)
Meggies (UK only)
Mi Goals (worldwide shipping)
Mochi Things (worldwide shipping)
Moleskine (international websites)
Mossery* (worldwide shipping)
Muji* (international websites)
Notemaker (ships to most countries)
Officeworks* (Australia only)
Orenda (Australia only)
Paperchase (ships to some countries + US website)
Papier D’amour (Australia + New Zealand only)
Paperdorable (worldwide shipping)
Passion Planner (worldwide shipping)
Pepperpot (worldwide shipping)
Personal Planner (worldwide shipping)
Poketo (worldwide shipping)
Public Supply (worldwide shipping)
Quill London (worldwide shipping)
Raven Press Co (worldwide shipping ex. Puerto Rico, Alaska, Hawaii, or Carribbean states)
Rifle Paper Co (worldwide shipping)
Ryman (UK only)
Scratch & Jotter (Australia only)
Sessa Vee (worldwide shipping)
Staples (international websites)
Studio Stationery (worldwide shipping)
Smiggle (worldwide shipping)
Sugar Paper (worldwide shipping)
Tabiyo Shop (international shipping)
Target (international websites)
The Paper Stone (worldwide shipping)
Tokyo Pen Shop (ships to some countries)
Typo (worldwide shipping)
Up & Atem (worldwide shipping)
Urban Outfitters (ships to most countries)
WHSmith (UK only)
Etsy stores
Fox and Fallow (worldwide shipping)
Karma Paper Co (ships to US and Canada - international on request)
Letter Love Designs (worldwide shipping)
Little Papeterie (worldwide shipping)
Made to Plan (worldwide shipping)
Moon Lume (worldwide shipping)
Plan Bright Planners (worldwide shipping)
SHP Planners (worldwide shipping)
She Plans (worldwide shipping)
Simply Notebooks (worldwide shipping)
Sugar and Type (worldwide shipping)
Posy Paper (worldwide shipping)
Purple Trail (ships to some countries)
If you’ve got a store you’d like to recommend, don’t hesitate to message me! Hope you like this post and find some cool new stores to shop at x