Diy How To - Blog Posts
this info must be shared ‼️
DIY How-To; Aluminum Can Spikes


Preface; This will work with any kind of can as long as its metal. (soda, monster, ect) You can make them in colors depending on which side you trace your stencil on but im gonna teach you how to make them silver
And i cannot stress this enough,
BE CAREFUL WITH THE RAW CUT EDGES OF THE CANS, THEY ARE SHARP ENOUGH TO CUT BADLY
Material needed;
Empty clean aluminum can(s)
Sharp scissors (maybe a stitch ripper for attaching them but scissors work too)
A sharpie or permanent marker
Superglue if you want them perfect
An abundance of patience and caution
1 Gather your aluminum
First step is to turn those cans into flat sheets of metal. Start by making a small cut near the rounded edge of the top or bottom, about this distance

Then cut around the top to connect back where you started and take the ends off.
Next you cut a line straight down the side to interrupt the loop of aluminum.
What I do next is kinda just flatten it the best I can? Press it against a flat surface, make tiny bends against the curve, just to make it easier to work with, always being careful of the sharp edges
2 Make a stencil
So the general shape youre gonna wanna make it is like this
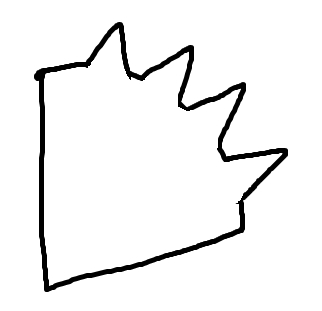

The big point will be the tip of your spike, and the little nubby ones will hold it on
imo it helps to have an extra can to experiment with what works best for what youre going for, but once you figure it out, have one flat cut out piece to trace for the rest, to make sure they all come out the same!
3 Trace a bunch and cut them out!
Sounds easier than it is. if you work with it, you can get more spikes sometimes by drawing them close together, but then theyre harder to cut out. Again, be careful of edges. If you want silver, trace on the printed on sign so you dont get sharpie on your spike (or dont, mistakes are punk)
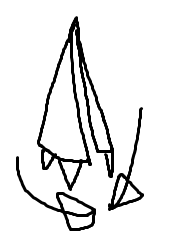
4 Roll them up
This takes a little practice, but what you wanna do is roll up the wider end of the triangle, one edge over the other, into a pyramid, forming a spike with the point of the big triangle at the end. (this ones harder to draw)

Sometimes theyll stay curled tight on their own, sometimes they need a little help (superglue) i havent figured out how to make em curl perfect every time yet. You can also fill them with hot glue to make them sturdier ( BEING CAREFUL OF THE SPIKES WHEN THEY HEAT UP FROM THE GLUE) But the good news is your spikes are done!
4 Affixing them to your shit
Once you figure out where you want them, hold the bottom triangles on the first spike up to the spot it goes like you mean to put it in, mark where they touch the fabric, and then take your scissors or stitch ripper and cut four little tears that DO NOT connect at those points.
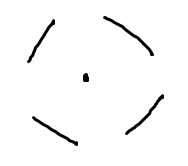
It should look like this, with the center dot representing where the spike point is centered!
You should also give each spike enough room that the tears dont run into each other. I usually do them one at a time but i dont think it matters.
After the tears are cut, you carefully insert the bottom triangles into the rips

flip it over, and fold the triangles in over themselves like a staple

Repeat until youve added on all your spikes and your piece looks sick as fuck
5 Bonus; patching over the studs
So when you do this, like a staple, theres the little pointy bits sticking in, and if its a wearble item, it'll prick your skin. If youre autistic like me thats a big drawback, but you can remedy this by sewing a patch of a thicker material (i use denim) over the place where these spikes are holding on.